Sunday 30 December 2012

Book Review: How to Brew

John Palmers How To Brewlink is considered to be todays standard book for new brewers.  This is due to two factors - How To Brew is excellently written and is a great guide for beginner brewers. But even better, Mr Palmer has put the first (1999) edition on a webpage, for free.
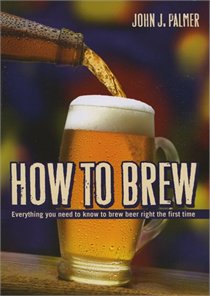
How To Brew (free version)
Extract-Based Recipes: 4/5
All-Grain Recipes: 3/5
Beginner Brewing Methods: 4/5
Advanced Brewing Methods: 3/5
Other Features: 3/5
Overall: 3.4/5
How To Brew (3rd Edition)
Extract-Based Recipes: 4/5
All-Grain Recipes: 4/5
Beginner Brewing Methods: 5/5
Advanced Brewing Methods: 4/5
Other Features: 4/5
Overall: 4.2/5

The biggest difference between the free and 3rd edition is the up-to-datedness of the recipes and methods. The 3rd edition was printed in 2006, about the time most of our modern methods became cemented int place. In contrast, the free version is somewhat out of date - the all-grain recipes in particular often rely on mash schedules orientated towards the poorly modified grains common in the 1990's rather than the better-modified malts of today.

The recipes in this book (especially the 3rd edition) are really good, with all grain and extract-based versions of most recipes provided. The basic brewing methods are covered excellently in both books, while the 3rd edition does a reasonable job of explaining advanced methods.

Overall, this is a must-have for new brewers. Old-timers will find this book largely superfluous, as anyone reasonably comfortable with all-grain brewing will be familiar with most of what is covered in this book.

Saturday 29 December 2012

Book Review: Three Recipe Books

Next in my series of book reviews is a review of not one, not two, but rather, three recipe books. These three books fall into the "not sure these were worth the money" category. I purchased all three of these while in my "intermediary brewer" stage, when I brewed using a mix of malt extract, adjunct grains and hops.

Clone Brews
Extract-Based Recipes: 4/5
All-Grain Recipes: 3/5
Brewing Methods: 2/5
Other Features: 1/5
Overall: 2/5
Beer Captured
Extract-Based Recipes: 4/5
All-Grain Recipes: 3/5
Brewing Methods: 2/5
Other Features: 1/5
Overall: 2/5
The Homebrewers Recipe Guide
Extract-Based Recipes: 3/5
All-Grain Recipes: NA
Brewing Methods: NA
Other Features: 4/5
Overall: 3.5/5

Full Reviews Below

Book Review: Papazians Books (AKA The Homebrewers Bible)

Over the years I have accumulated a fair number of books on homebrewing. A few of these are excellent, others are good, a few are not worth the paper they are printed on. I thought I'd use a little of the Christmas break to review them.

The first of these reviews is about two books - The (New) Complete Joy of Homebrewing & The Homebrewers Companion, both by Charlie Papazian. These are not so much two books, as they are two parts of a single, comprehensive book. For many brewers these books are the homebrewing bible - literally the old & new testaments of how to make beer.  Because they are now over 20 years old they are now a little out-of-date, but remain excellent books none-the-less. They have been, and remain, my chief homebrewing books.

The (New) Complete Joy of Homebrewing
General Brewing Knowledge: 4/5
How-To: 4/5
Beginning Brewing: 5/5
Intermediary Brewing: 5/5
Advanced Brewing: 4/5
Recipes: 3/5
Overall: 4.2/5
The Homebrewers Companion
General Brewing Knowledge: 4/5
How-To: 4/5
Beginning Brewing: 4/5
Intermediary Brewing: 5/5
Advanced Brewing: 5.5
Recipes: 4/5
Overall: 4.3/5

Charlies greatest strength is explaining things in a way anyone can understand. As such, these books are accessible to all brewers.  Technical jargon is kept to a minimum, complex subjects are broken down into manageable bits, and different ways of achieving the same end-point are often presented - thereby allowing a brewer to take the route most compatible with their comfort level and budget.

There are two downsides to these books. The first is their age - they are at (or over) 30 years old. As such, many of the methods and procedures described have since been modified and improved. The second downside is the recipes: they are dated and built around the poor-quality products available to brewers at the time the books were written (early 1980's). The recipes are not bad, but have a "homebrewed" taste to them.

Full Reviews Below

Tuesday 18 December 2012

More Drinking With Santa


So Christmas is near, and many bottles of Bad Santa (read the saga here, here, here and here) have been handed out with the explicit instructions "Do Not Open Until Christmas".  So I'm nervous; we've got a less-than-perfect brew just a few days away from being imbibed by friends & family - including more than a few beer snobs.  So what is a brewer to do - other than test, and test again?

Good news is the beer has improved greatly - much of the strong sweetness that dominated the beer earlier has faded into a more pleasant maltyness.  The ginger & cinnamon has mellowed, the rough edges are now gone.  Moreover, notes of honey are (finally) beginning to show through.  Even that pesky haze has faded slightly...although the beer remains less than ideally clear.

Based on how its aged so far, I'd predict peak goodness in another month or two - but it's more than good enough to be served on Christmas.

I guess Bad Santa decided to play nice...

...And Merry Christmas everyone.


Thursday 13 December 2012

I'll be home for XMas

Well, not really.  But I do have a Christmas 6-pack waiting for me under my tree.


As you can see, a very angry penguin is guarding it for me...

Wednesday 12 December 2012

The Genetics of Beer Foam

Fear the frankenyeast!
Several weeks ago it was announced that a yeast gene responsible for helping create the head on beer had been discovered[link to actual science paper].  As with most scientific discoveries, this was met with a mixture of really bad reporting and screams of terror from those who think a cloud of frankenyeast are about to descend on society, consuming all of us in an orgy of genetically-engineered fermentation.

So what was really discovered?  What does it do?  What does it mean?  All is explained, below the fold.

Monday 10 December 2012

Tasting Notes: 1040 Special

1040 in the glass.
So the 1040 Special Bitter is kegged and ready.  Like most bitters, this was ready to drink ~14 days after the yeast was pitched, and has hit ideal taste conditions within 3 or 4 weeks!

Pouring 1040 creates a silky, long-lasting head that leaves Belgian lace down the sides of the glass.  This head is rock-solid, lasting throughout the whole pint.  Hops dominate the aroma of this beer, although a mild maltiness makes its way through.  Despite adding both Irish moss and gelatin, there is a chill haze to this beer - likely due to my inability to use my immersion chiller after November, as I brew in my garage and we have to shut off the outside taps once night time temps drop below freezing...

...a pewter tankard takes care of the haze issue.  Most importantly, this is a great tasting beer.  The flavour is dominated by the bitterness and flavour of East Kent Goldings hops, which provides a sweet/floral flavour characteristic of many English ales.  This is balanced nicely with the malty flavour of maris otter and crystal malts.  The one drawback to this beer was the use of the Burton Ale yeast.  This yeast is known for producing the fruity esters that characterize English beers.  While most English yeasts produce these flavours, the Burton produces them strongly - too strongly for the weaker body/flavour of this beer.  A strong fruit ester profile is noticeable in 1040, and while the character of it is right, it is unbalanced compared to the rest of the flavours in the beer.  I would brew this beer again, but next time I would aim for a London Ale or ESB strain - something that would provide a more balanced ester profile.

The Great One Speaks

Charlie Papazian[wikipeida, blog] is one of home brewing greats.  His books The Complete Joy of Home Brewing and The Home Brewers Companion were, for over 20 years, the go-to source for home brewers.  It was his books that first got me into home brewing, led me through my first tentative brews, led me to all grain brewing, and even gave me the guts to start designing my own recipes.  If it wasn't for Charlie, I don't think I, or may others, would ever have started home brewing.

Even more importantly, he coined the phrase most of us home brewers live by - Relax, Don't Worry, Have A Home Brew (RDWHAHB).

Despite his iconic stature, Mr. Papazian is not the public figure you would expect.  He hasn't written any new books, he doesn't maintain a high profile in any of the homebrewing message boards which seem to be the new way homebrewers share advice, recipes and methods.  Its not that he is no longer involved in homebrewing - indeed, he is the president of the Brewers Association and maintains a brewing blog - but we don't see as much of him as we used to.

So imagine my delight when, through one of those new-fangled homebrewing discussion boards someone posted a link to an old (1990's) Canadian broadcast of Charlie going over the basics of homebrewing.  Great to see him in action - and the advice he gives is as valid today as it was back then:

Soma TV's Homebrewing with Charlie Papazian

Thursday 29 November 2012

Drinking with Santa

A Pint of Bad Santa 2012
While it is still too early to seriously start drinking, the giant pooch-screw that was this years Bad Santa brew session  concerned me.  As such, I'm trying Bad Santa a month earlier than I should, to see what it has become.

The pour is good - a nice, long-lasting rocky head forms, and is accompanied by an aroma dominated by ginger, but with detectable hints of malt, honey & cinnamon. The beer is darker than expected, but this was expected given that I had to decoct a few times to get mash temperatures to where they were supposed to be. Despite using irish moss in the boil and gelatin in the keg, this beer has a bit of a haze.  I nerded out and tested a sample at work.  No yeast were seen under the microscope, eliminating suspended yeast as the suspect.  An absorption spectrum did not reveal a strong absorption peak at 280 nm (the absorption peak of tryptophan), making a protein haze unlikely. The addition of iodine created a weak absorption peak at 580 nm, meaning that residual starches are the most likely culprit1.  Given the mash issues I had, the presence of starch is not unexpected, but oddly, the iodine test of my mash was negative.


Wednesday 28 November 2012

Yeast Banking IV - Starter Tables

So it appears my post on stepping up to a pitchable amount of yeast created some confusion (and has an error).  Here are some simplified tables to lead you through the process.  The days of the week are set-up for how the London Homebrewers Guild yeast banking operation works, but the tables are easily adaptable to any schedule.

For London Homebrewers Guild members reading this post, anything in italics is done by the yeast bank's yeast wrangler (i.e. me).

For Ales with a Starting Gravity Less Than 1.060
This will produce ~180 million cells, assuming yeast is grown using a stir-plate at 22 C to 24 C.
Day/Time Step Cells at End of Step
Before Monday AM Send me a PM on the board requesting yeast0
Monday AM Start 7 ml culture from frozen stock125-175 million (0.125-0.175 billion)
Tuesday PMPickup 7 ml cultures (from my house, or at Guild meeting).  Pitch into 250ml or 1.040 wort with stir-bar; grow 24 hours4 billion
Wednesday PM Pitch 250ml starter (plus stirbar) into 1.25L of 1.040 wort.  Grow for 24 hours 48 billion
Thursday PM Put starter in fridge, let yeast settle overnight 48 billion
Friday AM Pour off starter, replace with 1.5L of fresh 1.040 wort.  Stir for ~12 hours 185 billion
Friday PM Place starter in fridge. 185 billion
Saturday AM or Sunday Pour off all but a small amount of starter, swirl to suspend yeast and pitch into beer (use magnet to avoid pitching stirbar). 185 billion

For Strong Ales (Starting Gravity Greater Than 1.060) or Lagers
This will produce ~380 million cells, assuming yeast is grown using a stir-plate at 22 C to 24 C.
Day/Time Step Cells at End of Step
Monday-Saturday Follow the steps in the above table upto Friday PM185 billion
Saturday AMPour off starter, replace with 1.5L of fresh 1.040 wort.  Stir for 24 hours380 billion
Sunday AM Place starter in fridge. 380 billion
Before BrewStarter is stable in the fridge for 1 week; before pitching pour off most of the starter and swirl to suspend the yeast.  380 billion
Note 1: For best results (lager or high-gravity beer), it is best to pitch active yeast.  The easiest way to do this is to pour off the starter, add ~500ml of fresh wort, and stir for 2-4 hours at the planned pitching temperature.  This will get the yeast past their stationary phase and allow you to pitch yeast at high krausen, but with a minimal amount of starter wort (which tends to taste bad).

Note 2: If you have a 4L flask, the above process can be performed using a 3.5L starter in place of the 1.5L starter, producing 562 billion yeast - enough for a high-gravity lager.

X-Mas 6-Pack 2012


In the past I've always used Christmas as an opportunity to share my homebrew with friends and family.  While my success at getting new people into the hobby has been less than stellar (currently standing at zero), it at least has got people to try some new beers.

This year I'm taking it to a whole new level, and am sending out sample 6-packs, containing three different beers - two bottles each of Bad SantaCrepuscular Porter and 1040 Special.  And I've designed a series of labels for each beer.  Click to see the full-sized images.


Tuesday 20 November 2012

1040 Special Bitter

Sunday was brew day again.  This weeks beer is an English-style special bitter; a slightly more alcoholic version of the classical bitter that I so enjoy.This recipe seeks to replicate the English style at every turn - from using classical English Maris Otter malt as a base malt, to the classical East Kent Goldings hop, to the use of a Burton ale yeast; a yeast which provides the higher esters which typify English beers.

This beer was my first to take advantage of the new yeast bank I am running on behalf of my brew club, the London Home Brewers Guild.

No pictures this time around, just the recipe.  The brew session went flawlessly; I even hit my gravity dead-on - 1.040.  Hence 1040 Special...


Monday 19 November 2012

Yeast Banking III - Stepping Up To Pitchable Amounts

The last two of my posts on yeast banking covered methods to aid in the logistics of running a large bank, and covered how to prepare the frozen stocks.  In this third instalment of my yeast bank series I will cover how you go from a frozen stock to a quantity of yeast sufficient for pitching.

Firstly, how much yeast do you need to pitch into a beer?  The answer is 'it varies'.  Strain-specific characteristics, volume of beer you are pitching into, the specific gravity of the wort, the yeast quality, and the planned fermentation temperature all effect the number of yeast required. Calculators like Yeastcalc and Mr. Malty provide a good idea of what you need, although in many cases the number provided by these calculators are over-predictions.

This article assumes that you have the capacity to handle starter volumes of at least 1.5L (i.e. a 2L jar or flask), a stir-plate, and (ideally) dry malt extract (DME) plus yeast nutrients.

In this article:

  • How Many Yeast Do I Need?
  • How Do I Maximize Yeast Quality?
  • Growing A Starter.
  • I Don't Have A Stir Plate - Now What?

Tuesday 13 November 2012

Yeast Banking II: Methods to Manage the Bank

As discussed in my last article, I am now managing a yeast bank on behalf of the London Home Brewers Guild. In the previous article I outlined the methods we use, and the rational behind using those methods over other conventional methods. In this post, I will outline how the bank itself is run, with detailed protocols for the clean-up, freezing and “withdrawal” of the yeasts.

As mentioned before, these methods have been implemented assuming you have access to the facilities available in a biology lab – i.e. biosafety cabinet, micropipettes, autoclave, etc. In the future I hope to post an article on how this method can be implemented using the kinds of equipment the average home brewer can access.

Methods in this article:
  • Preparing & freezing the yeast
  • Checking for contamination
  • Secondary cleanup
  • How to perform a withdrawal
  • Counting yeast

Monday 12 November 2012

Yeast Banking I: Managing A Large Bank


Safale S-05 from our yeast bank,
bacteria-free & ready-to-pitch!
On the web one can find - literally - thousands of articles on yeast banking; the storing of yeast for long periods of time for use in future batches of beer. Depending on exactly what the brewer is trying to do, this can involve anything from pitching a new beer on top of a the yeast cake left over from the last batch, to collecting yeast from the kraussen of a fermenting beer (top-cropping), to yeast washing, to storing yeast on agar slants or frozen in glycerol-containing liquid media.

All of these methods have their pluses and minuses – including equipment limitations, difficulty, storage life, and a variety of other factors. I am fortunate enough to run a biology lab, and thus have access to tools and methodologies not easily accessed by most home brewers. As such, I am using these resources to maintain a yeast bank for my brew club, the London Home Brewers Guild, in which we are banking as many yeast as we can manage. As part of this process I am writing a series of protocols and articles to inform my club as to how the bank works. Many of these articles I will simul-publish here on my blog, for those on the web whom are also interested.

This first article is a brief intro into our yeast bank. I will follow this article in soon (edit: here is is!) with a detailed method (with pictures!) of how we bank our yeast, ensure they are free of contaminating bacteria, and distribute the yeast to members.

More below the fold...

Thursday 8 November 2012

Ummm, porter

So the Crepuscular Porter has been in the keg a few weeks and it has come out fantastic.  Its a bit darker than I anticipated - I was expecting a dark nut-brown, but instead its  as dark as any stout.  But that aside, its otherwise exactly what I was hoping for.  In many ways, it has exceeded my hopes.

This porter pours with a thick, creamy head, that does the "Guinness thing" where bubbles of beer appear to move downwards.  This quickly subsides into a thinner, but long lasting head that leaves strands of Belgium lace down the sides of the glass.

This head overlays a brew with strong malt-notes, that has hints of nuttiness and coffee-like roastiness.  Unscarred by any hop aroma, the slight fruitiness of the British ale yeast is detectable among the strong coffee and nut aromas.  The smell is so enticing that I have, on occasion, almost forgot that I'm supposed to drink it.

Every sip of this beer is heavenly.  It is silky on the tongue, with malty sweetness nicely balanced by subtle, but noticeable hop bitterness.  Despite the (relatively) large amounts of darker malts, there is no detectable astringency.  This beer featured light chocolate malt - a rarer malt that is slightly less roasted than conventional chocolate malt.  The impact of this malt is profound - while the beer still has a dark colour, the usual in-your-face roasted flavor and its accompanied astringency is missing.  In its place is a mellow, and entirely pleasant, nuttiness.  It makes for a much smoother and easy-drinking brew.  This mellow nuttiness, combined with this beers modest body, means that unconsciousness, not a heavy stomach, limits how many pints one can quaff in a single sitting.

Bad Santa's Bein' Naughty

So its time to keg bad santa, but things are not what they should be.  What should be a clear beer remains cloudy.  Given all the bad things which happened, I shouldn't be surprised that things are not 100%, but still...

The problem may not be obvious in this photo, but the beer remains cloudy - this should be an amber-coloured beer with a bit-o-red in the colour.  It is that colour, but there's also a lot of haze, making it look darker than it should be.

Why is the haze there, why won't it go away?  Short answer is . . . I don't know.  Hopefully its protein or yeast - a bit of gelatin at kegging will pull that out.  But I fear it may be starch - which no force on earth will get rid of.

Hopefully it'll still taste good, but this may be a beer to drink out of a ceramic tankard.

Tuesday 23 October 2012

What The . . . Ferment (AKA Bad Santa Update)

Saturday was not a good brew day.  But it is long past, and my angst has receded.  This years Bad Santa brew session did not go as planned...but there are hopeful signs that things may have worked out - perhaps even for the better.  A short-list of the issues I had:

  1. Mash tun developed a new leak - I jury-rigged a washer to fix the seal, but I'm going to need to re-visit my design to find a permanent fix.
  2. I brewed in my garage, with doors open, on a cold-and-windy day.  Turns out hurricane-force 5C winds will cool even a well insulated mash tun (66.5C -> 58C in ~40min).
  3. To fix issue #2 I had to decoct (remove some grain and bring to a boil) a couple of times to get temps back to 66.5C.
  4. Dropped & broke my good thermometer, meaning I had to use my poorly-calibrated one while preparing my sparge water.
  5. I got a stuck sparge while batch sparging - something which is supposedly impossible.
  6. Collected ~2L less wort from the sparge than expected
  7. Had a massive boil-over; we're talking at least a litre of the good stuff on the floor.
  8. Melted my wine thief while trying to grab a sample of wort for a SG measurement.
Despite that, somehow, I managed to hit a S.G. of 1.085 - instead of the expected 1.067.  The difference means, assuming a normal FG, the beer will be an extra 1% in alcohol concentration - 8.6% instead of 7.5%.

Just goes to show that even mistakes may produce desirable brews...assuming it tastes good.

Sunday 21 October 2012

Saturday 20 October 2012

Bad Santa Holiday Ale

It's a little late, but I'm finally brewing a holiday ale for the Christmas season. This is an old recipe - named and brewed a decade before BYO magazine stole my name for what appears to be a inferior beer (I jest, it looks pretty good).  My Bad Santa is a great winter beer - strong (~7.5%), medium-bodied, with cinnamon, honey and ginger adding to the already great dynamic provided by hallertauer and cascade hops, aromatic malt, and wheat. Assuming this one replicates previous batches, it'll be ready for the holiday season and well into 2013.
Not your usual brew - honey, ginger and cinnamon round out a strong ale brewed with wheat, roasted barley, caramel malt and hallertauer/cascade hops.

Recipe below the fold...

EDIT: and update on a miserable day brewing this beer can be found here...

Saturday 29 September 2012

Simple Time-Saver

Measuring out beer volumes is not always easy - 18.7L of water = 19 measures with our 1L measuring cup. A simple way to deal with this is to mark your bucket - carefully measure out set volumes, let the water stop sloshing around, and pen it in.  It'll save you valuable time in preparing your beer.


Crepuscular Porter

Fall is here - time to do away with the lighter summer beers and start brewing rich, dark, beers that warm the soul on cold winters nights.  Dark beers - browns, porters, stouts, olde ales & Scottish exports - are among my favourite beers.  Of these, porters top the list.

Porters are not a commonly encountered style - at least, not here in Canada.  It is too bad - aside from being important historically, porters stand as one of the most diverse styles of beer out there.  On one extreme porters are medium-brown in colour, differing from brown ales in their extra hoppiness.  On the other extreme are dark porters - would-be stouts but for a bit more dark malt bitterness.  Between those two extremes is a huge range of beers - sweet to dry, mild to hoppy, some with toasty nuttiness, others with the coffee-like flavour of roasted malts.  Swap out the ale yeast, substitute a lager yeast and lager fermentation conditions, and you get a baltic porter - every bit as diverse as the ale version, but with the mellower nature of a larger replacing the flamboyance of ale yeasts.  For the brave soul, one can take a sweet porter, subtract the hops, add in some/all of vanilla, wintergreen, licorice root, sarsaparilla root, nutmeg, anise, molasses, cinnamon, clove, or honey - and you have a real rootbeer.  Alcoholic, richly flavoured, sweet and spicy.  Its the great-grandpa of the soda enjoyed by so many.

Today's brew is a middle-of-the-road Porter.  Crepuscular Porter is named after crepuscular animals - animals active at twilight and at the dawn.  Accordingly, this beer lacks the midnight blackness of darker porters and stouts, bearing a medium-brown colour (30SRM).  With a hoppiness on the higher-end for the style (32IBU), 5% alcohol, and with a rich nuttiness imparted by a rarer adjunct grain - pale chocolate malt - this beer will be a nice brew to enjoy while racking leaves or while warming up after a chilly bike ride home from work.

More Below the Fold...

Tuesday 25 September 2012

A Bit of Bitter

The Vestigial Bitter, brewed a few weeks ago, is done.  It is an excellent beer - the best beer brewed since I started this blog.  It is a light beer, coming in at 3.7% alcohol (it was planned to be 3.5%).  It is thin-bodied, with its flavour dominated by hop bitterness with hints of hop flavour and crystal malt.  It is lightly coloured - just a tad lighter than an American-style lager (i.e. Bud).  Its effervescent and light - great after a hard days work, or a good beer to use to convert a friend from the generic mass-produced lagers that dominate the market to homebrew and craft beers.

Because of its low alcohol content, it won't age too long, but the low content also means that many pints can be quaffed without suffering for it the next AM.  This style is traditionally served with minimal carbonation; I'm not a fan of that, and as such have carb'd it to a level common for most beers (2.4 volumes).  The extra carbonation gives this beer a lighter feeling than usual, and in combination with the flaked barley, creates a fine, long-lasting head that lasts the whole pint.

My sole disappointment is the absence of colour and relatively weak crystal character.  This beer will be brewed again (and again, and again).  But next time I'll double the crystal to give it a bit of a red colour and a bit more of that sweet crystal character.

Monday 3 September 2012

Überschuss = Übergood

So the Überschuss European Ale is in the keg.  It turned out very well, especially considering I essentially pulled the recipe out of my ass.

The beer stayed in the primary for 3 weeks - AKA the time from brew-day to the return from my holiday.  After transferring to the keg I added 1 package of "bloomed" gelatin to help clear the beer, and put it in the fridge under ~13 PSI of CO2.  One week later it was cleared and carbed.

The beer itself was darker than expected, and pours with a bubbly head that collapses over a few minutes into a thin, but creamy, lace that lasts the whole pint.  As you can see, my keggerator woes were not completely fixed by my modification to my kegging setup, meaning I still have a bit of building to do.

Taste-wise, it is a pleasant surprise.  Before you sip, you're hit by a bit of maltyness with a hint of floral hops.  Those characteristics continue on into the taste - a sweet, but not overpowering maltyness, with a nice balancing (but not strong) bitterness.  The flavour and aroma of noble hops is present, but again, not overpowering and nicely balanced with the maltyness of the brew.  At first it finished with an almost-unpleasant lingering bitterness.  That is already beginning to fade, and should be gone within a couple of weeks - likely about the same time I empty the keg.

This one will, without a doubt, be brewed again.

Brew Day: Vestigial Bitter

Today I continue my mission to rid myself of some leftover brewing ingredients, before they go off.   The second recipe in this quest is a common English bitter - and unlike my Überschuss European Ale, this one is pretty much by-the-book.

The brew session went without hiccup.  Hit of OG right on, colour looks good, smells good too.  Despite the 30C temps, I managed to re-do all of the hangers in my garage during the boil - AKA multitasking!  It'll be a few weeks until we know the real story (about the beer; the garage is fine), but I have high hopes.

No pictures from today's brew session - but you will find the recipe below the fold.

Brew Science: The Iodine Test

This is in first of a series of articles about the science behind basic brewing processes.  These articles will explain how many of the procedures we use in brewing work - and hopefully provide sufficient information on how to make us of these tests/processes in your own brewing.

An iodine test [wikipedia] is used by brewers to test for conversion of unfermentable starches into the mixture of fermentable sugars and unfermentable dextrins which comprise the sweet wort we ferment to make beer.

The presence of starch in beer is very much unwanted.  Starches cannot be fermented, and induce an unpleasant appearance and feeling the the resulting wort.  In contrast, fermentable sugars (mostly glucose, or 2-3 glucose's attached togeather - AKA maltose and maltriose) are consumed by yeast to make alcohol, and unfermentable dextrins (short chains of glucose) which impart a malty flavor and mouth-feel to the beer.


Left: the branching structure of starch.  The '...' link to additional starches of glucose molecules (see below image).  A single starch molecule will be comrpised of many hundreds of glucose molecules.

Above: the structure of the long chains of glucose.  
 A single molicule of gluocse.  Images from wikipedia.

The process of breaking down starch into sugars and dextrins is called saccrification (or conversion), and is driven by soaking grain in water at the desired temperature (generally 63-66C).  At these temps, enzymes called amylases break down starches into sugars and dextrins.  Many beginning brewers simply wait-and-hope for conversion to complete.

If only there were a better way...

Tuesday 28 August 2012

Why didn't I Buy This Earlier?

Before departing on my holiday I mail-ordered a large-diameter (1/2") auto-siphon.  What is an auto-siphon you ask?  It is this:

Basically, its a siphon you start by pumping the racking cane (the hard plastic portion of the siphon) inside of a wine-thief like outer tube.  Pumping primes the siphon, then you set back and let it rip.  No sucking beer into the siphon, no pre-filling the siphon with water, no fingers plugging the business end, no accidental contacts while trying to move a filled siphon into the beer and empty keg.  Simply clean, insert into beer/keg, pump a few times, and away it goes.

This thing is a huge time (and pain) saver.  It takes a few seconds longer to sanitize, but starts in a few seconds, and the larger diameter of the siphon drained 20L of Überschuss European Ale into a keg in less than two minutes - far faster than the normal 5-6 minutes usually required to transfer that much beer.

Faster and easier - and probably a lesser chance of infection as well!

Monday 6 August 2012

Eight Hundred Billion

This is either the happy, or depressing, thought of the day.

I am in the process of trying to setup a yeast bank so that I can share yeasts with brewers around the country.  As part of this, I've been researching yeast growth characteristics in wort under various conditions.

As part of this research I came across a staggering number - 50,000,000.  That is, on average, the peak number of yeast you'll find in the average batch of homebrew  - per millilitre.  Fifty million per mil (range is 40-60 million/ml).

Wow.

Taking into account the average sized batch of beer (5US gal, 19L), and the amount of yeast typically left in finished (unfiltered) beer, that works out to 800,000,000,000 yeast dying for one batch of beer.  Eight Hundred Billion.

Yes, billion - with a 'B'.

I've got to work that into a label for a future batch of beer - something like 'Eight Hundred Billion yeast died to bring you this beer - you better enjoy it'.

Too dark?

Sunday 5 August 2012

Emergency Brew Session - Überschuss!

As mentioned in my last post, I have a problem with my kegging system - I drank all the beer, and didn't have a new batch on-route.

This isn't the first time my consumption has exceeded my brewing, but my usual solution - a quickly-made English bitter (ready in as little as 10 days) - was not in the cards as I'm off for two and a half weeks at the cottage (you're bleeding for me, I know it).

Not  only that, but I had some leftover hops and grain from my last batch - the hops especially need to be used as their shelf-life is not great.  Using a few brew book and the net I cobbled together two recipes that would deplete this store.  The first of these is a real hodge-podge of stuff, that may or may not be a good brew.  Its vaugly formulated on an European-style ale (i.e. an Altbier).  The second, to be brewed when I get back from the cottage, is a more traditional English Bitter.

Todays brew - Überschuss European Ale

Überschuss (German): surplus, excess

More below the fold

Two Problems With Kegging

My recent foray into kegging has revealed two serious problems.  The first of these has to do with my kegorator setup.

The problem, as you can see to the right, is whenever I pour I get a head of foam.  At first I suspected the usual suspects - bad poor technique or beer lines which were too short.  But a closer look revealed something different:

At the beginning of the pour (top), pure foam comes out of the tap.  But after a few seconds, a proper pour ensures (below).  After the first glass, I can pour successive glasses that are perfect pours.


A bit of searching identified my problem - the beer lines in the tower were not being cooled, so the first bit of beer to pass through warmed, releasing its CO2, causing the foaming.  The flowing beer then cooled the line, resolving the issue.

Problem 1: Beer lines in tower are warm.
Solution: Create a heat-sink.

More below the  fold...

Tuesday 17 July 2012

Kegging the moon

The La Lune Bleu is now kegged and carbed - an old recipe combined with my first attempt at kegging makes for an interesting experience.

The kegging was great - essentially consisting of the first step of bottling - you transfer into a clean container.  And then you're done - no mixing sugar, no transferring to bottles, not capping.  Just a few seconds blast of CO2 to purge the O2 and away you go.  Not being a patient man, I took a bit of a carbing shortcut - I pressurized to 30PSI, unhooked the gas line, and shook the beer.  This got it ~50% of the way carb'd.  I then hooked up the lines, re-pressurized to serving pressure (14PSI) and let sit until carb'd - about 3 days.  Beer was properly carb'd when tested on day 4.

There is one minor problem, that being the first few seconds of a pour are all foam.  A bit of investigating has revealed that this is due to warming of the beer in the tower portion of my kegorator.  To fix this, I'll be sheathing the beer-line in copper tubing, which'll act as a heat-sink to the main body of the kegorator.  A minor problem, but one which is irritating none-the-less.

As for the beer, its good.  This is the sixth or seventh time I've brewed this beast, and as in the past its a good beer.  The only difference is the brew has a bit of  a yeasty odour/flavour.  I did swap out my normal Wyeast American Ale for Safale US-05, but I doubt that is the issue - far more likely, I kegged to soon.  It should fade with ageing - that is, if I don't drink all the beer first.

Since this beer is kegged, the label is for a tap handle (see image to left).  But since some will need to go into bottles, I've designed bottle labels as well (image below).

Thursday 5 July 2012

Just a Taste...

Normally, when allowing bottled beer to naturally carbonate, you need to let them sit for 3 weeks to reach full carbonation and to allow the yeast to settle (otherwise, the beer can have a nasty yeast 'bite' to it).  But, despite bottling less than 2 weeks ago, I couldn't wait any longer and had to imbibe in a bottle of my Parallax Pale Ale.

It was good - really, really good.  Some notes, pics, and the recipe, below the fold...

Monday 25 June 2012

Brewing Under a Blue Moon

Saturdays bottling session opened up a fermenter - which means it must be filled again.  So on Sunday I brewed "La Lune Bleu"; a beer which should resemble Blue Moon (in Canada, sold in a weakened form as "Richards White").  Its a Belgian-style wheat beer, with a yeasty twist.  Its made with a mix of barely malt, wheat malt, and rolled oats, with hints of hop bitterness, orange peel and coriander.  But this brew does away with the typical yeasts normally used in Blegian wheats, which produce fruity/estery flavours which tend to predominate Belgian beers.  In its place a mild ale yeast is used, allowing the malt flavour and spices to shine through.

A few pics below the fold.


Bottling the Parallax

Saturday was Bottling day.  The new labels look good on the bottle (see left image).

A few more pictures can be found below the fold


Thursday 21 June 2012

Labelize the brew

I've been brewing for nearly 18 years, but despite that, I've never given much thought to naming my beers, nor to making labels for my bottles.  Motivated by the amazing labels some brewers have made (here's a whole thread of amazing examples, over at HomeBrewTalk), I decided to try myself.  Being both a professional scientist, and a science nerd in general, I've decided to go with science-themed beer names.

This is my first attempt at a label, for my first all-grain beer since returning to brewing:

This is a 'tax stamp' style label, with the brewery logo (the black circle) centred over the cap, and the remainder glued to the neck of the bottle.  The QR code (generated by the excellent free service at http://www.qrstuff.com) encodes the recipe for 23L (5 imp Gal/6US Gal) of beer.  The beer itself is a heavily hopped pale ale, with a bit of a kick (6.0% ABV; in reality its probably 6.2%).

As for the name - parallax is a way of measuring distances by measuring the apparent change in position of an object as the position of the observer changes.  Its used to plot the position of close stars, by measuring the change in position of the star as the earth moves 1/2 way through its orbit.  What does parallax have to do with beer?  Very little - unless you drink too much, after which your defocused eyes may give you a bit of a sense of parallax...

Beginning Afresh

Welcome to my new blog, which will hopefully be slightly more successful (and slightly less nerdy) than my old (and apparently defunct, based on my activity there) science blog.

This blog is, in part, to record my return to home brewing, a hobby I've enjoyed for nearly 18 years, but one which I temporarily left for four years while pursuing my career (read: was living in a s**ty apartment while working 12+ hour days).  I also hope that this blog will become the home of a local (perhaps Canada-wide) yeast bank and related protocols.  I've run one such bank in the past, and hope to start another in the near future.

Hopefully, as of this weekend, I'll have some actual brewing-related posts to share.