
Firstly, how much yeast do you need to pitch into a beer? The answer is 'it varies'. Strain-specific characteristics, volume of beer you are pitching into, the specific gravity of the wort, the yeast quality, and the planned fermentation temperature all effect the number of yeast required. Calculators like Yeastcalc and Mr. Malty provide a good idea of what you need, although in many cases the number provided by these calculators are over-predictions.
This article assumes that you have the capacity to handle starter volumes of at least 1.5L (i.e. a 2L jar or flask), a stir-plate, and (ideally) dry malt extract (DME) plus yeast nutrients.
In this article:
- How Many Yeast Do I Need?
- How Do I Maximize Yeast Quality?
- Growing A Starter.
- I Don't Have A Stir Plate - Now What?
How Many Yeast Do I Need?
This is not the easiest question to answer, as the answer varies greatly with yeast strain, fermentation conditions (S.G., temp), and how you manage the starter. Most calculators work off of the 'standard' pitch rate of 1 million cells per milliliter of wort per degree Plato (AKA, 1 billion per litre per degree Plato). For your average 5 US gallon (19L) batch of 5% beer (S.G. ~1.050), that is 250 billion yeast.
The problem with that number is it is based on re-pitching old yeast from a yeast cake - yeast that is neither in peak health, nor overly ready for another round of fermentation. This amount of yeast would be serious over-pitching if using yeast grown aerobically (i.e. with a stir-plate) under ideal nutritional conditions. Happy/healthy yeast should be pitched at about 1/2 to 2/3 this rate - i.e. 125 to 175 million. 100 to 125 million is a good number to shoot for, if brewing 5 gallons of average strength ale.
But life is not quite as simple as this - for stronger beers (>1.065) or lagers you need to double this number - 250 to 300 million yeast for a 5 gallon batch. In my experience, the calculator at Yeastcalc provides the best calculations of both the number of yeast needed and the number you will get, given specific culturing conditions.
How Do I Maximize Yeast Quality/Activity?
The key to good yeast - i.e. one which will fully ferment a beer without producing the bad-tasting products characteristic of stressed yeast - is proper growth conditions. Namely, cultured yeast needs an abundance of two things - oxygen and zink. Counter-intuitively, oxygen is key to producing yeasts which can ferment effectively, despite fermentation being an anaerobic (i.e. oxygen-free) process. Oxygen allows yeast to synthesize three things needed for effective fermentation - glycogen, sterols and unsaturated fatty acids.
 |
| Glycogen |
1) Enables yeast to clean-up many of their undesired metabolic products, such as diacetyl, and
2) Delays autolysis of yeast which has sedimented to the bottom of the fermenter. The yeast in the yeast cake does not have ready access to whatever nutrients are left in the wort, and depends on this glycogen store to stave off death. Without sufficient glycogen, yeast can autolyse, leading to off-flavours in the beer.
 |
| Ergosterol |
Unsaturated Fatty Acids (UFAs) are part of the structural component of the yeast cells membranes. Like sterols, UFAs alter the fluidity and stability of yeast cell membranes. Without UFAs, the membranes of the yeast are overly rigid, and more prone to damage during stress.
The second key ingredient to maximum quality yeast is Zink. Zink is key to many of the enzymes yeast rely on during fermentation. Without it, fermentation will be much slower, and more prone to undesired fermentation products. Unfortunately, malt extracts, even those produced during all-grain brewing, are zink-poor. As such, starter media should be supplemented with a zink-containing yeast nutrient. It is best to provide this during the starter culture, as zink will be maximally absorbed and incorporated into enzymes in the presence of oxygen.
Growing Up A Starter:
 |
| 7ml culture produced from a frozen stock |
One option would be to throw this into 6L of 1.040 wort, which if stirred with a stir-plate, would produce the desired 150 billion cells. This, however, is both expensive, and due to the low pitch rate, is prone to infection. If the brewer is brewing a strong ale or larger, the situation becomes even more problematic - requiring a 14L starter for a 19L beer!
We get around this problem by using stepped starters - pitching smaller starters into ever larger starter, building up yeast numbers much more quickly than we would using a single-step starter. Ideally, each step should pitch the contents of the previous pitch into a volume 10x to 20x larger than the previous step.
The below-described method will produce usable amounts of yeast for pitching on Sunday, assuming a <1.060 S.G. ale is being brewed, assuming the brewer picks up their yeast Tuesday evening. If brewing earlier then this, or brewing a lager/higher gravity beer, yeast should be picked up one week earlier.
For a low-gravity (<1.060) ale:
If using jars to prepare media follow the steps labelled 'a'. If using flasks follow the steps labelled 'b'.
| Step1 |
| Measure out the media for the starter. Starters are made of dry malt extract (DME) at a gravity of 1.035 - 1.040. In general, use 100g/L DME, producing a wort of ~1.038. To this add the manufacturers recommended amount of yeast nutrient. Prepare two starters: a 200ml starter (with stir bar) and a 1.5L starter. Starters should be prepared in a flask or jar with at least 25% larger than the starter volume to leave space for the vortex & foam. In this example, I am preparing a 200ml starter in a 750ml jar, and a 1.5L starter in a 2L jar. | ||||
| Step2 |
| a) If using a jar, sanitize jar, lid and stir bar by immersing in water and brining to a boil. DO NOT PUT COLD JARS DIRECTLY INTO BOILING WATER. Boil for at least 10 minutes. b) If using a flask, prepare media in flask and place stir-bar in the smaller flask. | ||||
| Step3 |
| a) If using a jar, boil the prepared media in a separate pot at the same time as you are boiling the jar. Bring media to a boil in a covered pot, and once boiling reduce to a simmer. Simmer, lid-on, for 10 minutes. Once jars + media are ready, remove the jars from the boiling water using pre-warmed tongs; drain water from jar, fill while hot with wort (put stir bar into small jar), and cap. The draining of the jar/filling/capping should be done as quickly as possible, to maintain high temps. This will kill any bacteria that fall into the jar during preparation. Let cool at room temp until it can be handled by hand - at this point you can continue to let it cool at room temp, or move it into the fridge or a sink of cold water if in a rush. b) If using flasks, add water and DME to the flask, plus the stir bar to the smaller flask. Cover the opening with foil, and heat on the stove until boiling. Reduce boil to a simmer, and boil for 15 minutes. Let cool as described as in 'a', above. | ||||
| Step4 |
| Pre-oxygenate the starter by shaking the living daylights out of it. Starter should be given 5 minutes of vigorous shaking to oxygenate fully before adding yeast - even if you've got a stir-plate! Next, pitch the yeast, put the cap/foil back on the jar/flask. Do not tighten the lid - the lid needs to be loose to allow CO2 to escape. Failing to do so = exploding starter. Place on starter, and stir vigorously for 36 to 48 hours. The vortexing action should be strong enough such that the cone of the vortex hits the stir bar, thus driving many small bubbles into solution. | ||||
| Step5 | Once the small culture has grown, throw the entire contents of the starter (including the stir-bar) into the large 1.5L culture. Stir vigorously for 24 hours. This should produce ~160 billion yeast - plenty for pitching into an ale with a S.G. less than 1.065 | |||||
| Step6 | Throw the starter into the fridge for 24 to 36 hours; this will allow the yeast to sediment. | |||||
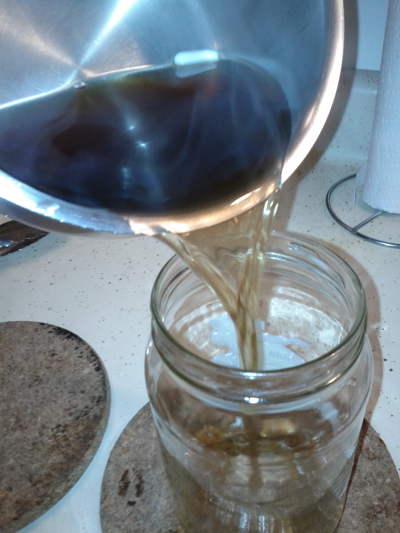
| Step7 | Pour off most of the wort, leaving just enough to cover the yeast cake. Slowly warm to within 5C of the pitching temperature. Swirl vigorously to re-suspend the yeast. Use a magnet to hold the stir bar in place, and pitch the yeast into your beer. | |||||


For a lager or high-gravity (>1.060) ale:
1) Follow steps 1-6 for a low-gravity ale. While the yeast is sedimenting (step 6), prepare an additional 1.5L starter solution, using a new jar/flask. If pitching into a lager with a gravity greater than 1.055 you need a larger flask/jar, as you will need to make a 3.5L starter for this step.
2) Once the yeast have settled, pour off most of the wort, swirl to suspend the yeast, and add the new wort to the flask. Stir vigorously for 24 hours, the refrigerate to sediment the yeast, and pitch as described in step 7 of the low-gravity ale procedure. If using a 1.5L starter you will produce ~360 million yeast, enough for a strong ale or 5 gallons of <1.055 specific-gravity lager. If using a 3.5L starter you will produce ~560 billion yeast, enough for a 5 gallon lager with a S.G. of upto 1.085.
I Don't Have A Stir Plate - Now What?
You can still make a starter without a stir plate. There are a number of methods to do this - the key is to introduce as much oxygen as you can during the growth of the starter. My preferred method (pre-stir plate) - and apparently a standard method among Australian home brewers - using plastic pop bottles.
This method is simple:
- Prepare wort as described above. Simmer in a covered pot to sanitize. Boil some water at the same time.
- While simmering the wort, fill a small (500ml or 750ml) and large (2L) pop bottles with a solution of 10% bleach in water. Cap & shake continually over the 10 min simmering of the wort.
- Dump the bleach solution and rinse quickly with the boiled water.
- Using a sanitized funnel (metal funnels can be boiled to sanitize; plastic should be sanitized with bleach), transfer the hot wort into the bottles. Place cap on bottle, but don't tighten.
- Once cool, cap tightly. Bottles can be stored in the fridge for a few days until needed. Before use shake vigorously to oxygenate.
- Pitch yeast into shaken wort, placing cap on the bottle loosely to allow out-gassing.
- Every time you pass the bottle (i.e. hourly, 5-times daily, etc):
- squeeze bottle to force the air out, then let expand to bring in fresh air (preferably in a dust-free area)
- cap tightly
- shake the s**t out of the bottle to oxygenate
- loosen the cap
- Transfer the yeast to larger starters using the same timing as for stirred cultures. This system works well, but produces 25% to 50% fewer cells per step than a stir plate. The more often you introduce new air, the higher your yeast counts.+
Hi Brian, thanks for your amazing tutorials.
ReplyDeleteSome people from forums say that starter wort should be hopped because of hop antibiotic effect against bacteria, while some respected brewers like Jamil say hops should be avoided in starter. Can you please share your opinion on this? Does hop presence in starter have any positive/negative effect or is it neutral?
In my opinion it is a waste of time. With proper sanitary techniques such hedges against infection are unnecessary. Moreover, it gives a false sense of security' most beer spoilage organisms grow fine the the presence of hops. Essentially, it a way of adding cost but not much else to your starter.
DeleteBryan, thanks a lot for your quick reply!
DeleteThat's exactly what I felt should be true, but just needed some confirmation. I shared your answer on one of Russian homebrewing forums, hope this will help people find better place for their hops :)
P.S. I'm sorry for misspelling your name in my previous message.