Wow, two videos in as many weeks - that has to be a new production record for me! This time around the video is on my most requested topic - an easy to implement home yeast banking system. The video outlines a method, based on the use of slants, to store yeast for future use. Managed carefully this method will allow the average home brewer to easily maintain stocks of up to 2 dozen strains with minimal cost or effort.
Because of the length of the video, and the presence of multiple separate methods, I have provided written instructions, below, to complement the video.
Friday, 27 November 2015

Tuesday, 10 November 2015
At long last, a new video!
A frequent question I receive here on my blog, and on other forums, is what microscope I would recommend for home use. This is a difficult question for me - I'm a medical researcher by profession, with microscopy representing the bread and butter of my lab (a bit of eye-candy from my labs work can be found near the beginning of the video). While on the surface this would appear to make me an ideal person to offer advice on microscope selection, alas, its not really true. Because I work with research-grade scopes (which are very pricey) I'm not really experienced in the cheaper, consumer-grade microscopes that are cost-effective for home use.
So in lieu of a video recommending specific models, I've instead put together a video discussing features to look for, along with comparison images to give you an idea of what the various features add to a microscope.
Also, I apologize for the crummy audio; I'm experimenting with screen casting as a way to speed video production (which, in my case, is excruciatingly slow), and haven't quite figured out how to properly balance my mic.
So in lieu of a video recommending specific models, I've instead put together a video discussing features to look for, along with comparison images to give you an idea of what the various features add to a microscope.
Also, I apologize for the crummy audio; I'm experimenting with screen casting as a way to speed video production (which, in my case, is excruciatingly slow), and haven't quite figured out how to properly balance my mic.
Monday, 9 November 2015
Triple-Recipe Update
I've somewhat fallen down on the blogger job - I'd done three brews in the past week and not one blog post about any of them.
In my defence, the first two batches barely qualify as either brew-days or recipes...enter this years ciders!
The recipe for both is dirt-simple:
Cider #1: This is the classical cider that I've brewed 3 times in a row now (last years recipe) - 20 L of fresh-pressed cider, 3 g potassium metabisulfate, 5 g of yeast nutrient, 3 tsp pectic enzyme and 1 packet Nottingham dry yeast. The process is dirt-simple:
Learn-To-Brew IPA
In my defence, the first two batches barely qualify as either brew-days or recipes...enter this years ciders!
The recipe for both is dirt-simple:
Cider #1: This is the classical cider that I've brewed 3 times in a row now (last years recipe) - 20 L of fresh-pressed cider, 3 g potassium metabisulfate, 5 g of yeast nutrient, 3 tsp pectic enzyme and 1 packet Nottingham dry yeast. The process is dirt-simple:
- Add metabisulfate, let sit ~4 hours
- Add yeast nutrient and pectic enzyme, let sit overnight
- Add yeast, let ferment ~3 weeks before transfering to secondary
- Age until ready, typically 6 months.
Cider #2: Take the recipe for cider #1, drop the yeast and split everything else in half (its a half-batch). In place of Nottingham, pitch a Belgian yeast (Fermentas T-58, this time around). Everything else is the same. The hope here is to get an effect similar to mulled cider, but without the addition of spice.
Learn-To-Brew IPA
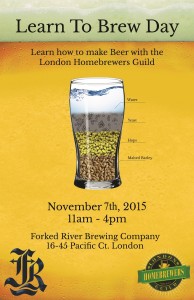
The third brew, brewed this Saturday, was a hop-bursted IPA which I brewed at my brewing clubs annual learn-to-brew event held at Forked River Brewing. For some reason I decided to go whole-hog on this beer - water additions, sparge acidification, whole hops, and so forth. But because this was a learn-to-brew event most of that (except the hops) got missed during the brew-day, so it may not quite end up where I wanted it. Regardless, its a pretty simple (and good smelling) brew:
- 6 kg Canadain 2-row malt
- 450 g Caramunich II
- 230 g Victory malt
- 85 g (3 oz) Centennial whole-hops, 15 min whirlpool
- 85 g (3 oz) Citra whole-hops, 15 min whirlpool
- Enough of a bitterning hop (N. Brewer), 60 min in the boil, to get the beer to 65 IBU
20 L final volume at 1.064. Mash for light body, use burtonized water, adjust mash pH with lactic acid, irish moss @ 15 min to help clear.
Of course, to replicate this beer add the salts to the boil, rather than to the mash/sparge, forget the irish moss, and boil for ~68 minutes, all while forgetting to take photos of the brewing event because you're too busy teaching new people to brew yakking with anyone who drops by your mash tun.
Thursday, 5 November 2015
Tasting Notes - Training Wheels CPA
 |
| Even the dog comes running for some CPA! |
The goal of this beer was a beer that was easily enjoyed by both the "big-3" beer drinker and the more craft-orientated brewer. To achieve that end I employed a middle-or-the-road approach to a pale ale; a more interesting malt profile than is the norm for a hoppier pale ale, but then modestly hopped with a mix of citra & centenial.
This combination makes for a pretty good beer - its not going to wow a true hop-head, and it may be a little more than a BMC drinker is used to, but it should keep drinkers in both camps happy...I know its been keeping me happy as I wait for other beers to mature.
Here's the breakdown:
Appearance: Copper coloured and quite clear. Pours with a dense white head that last for the pint.
Aroma: Hop aroma is present but subdued. Because I know what went into it I can pick out the citra fruit notes and the centennial resinousness, but I think that most people would simply say it has a modest new-world hop aroma. Along side that is a wonderful malt aroma - a clear malt/sweet note that is nicely balanced by the hops.
Flavour: The flavour of the beer is pretty good - up-front is a nice maltiness; somewhat sweet, but not excessive. The hop flavour is more subdued than I had expected; a bit of the citra/centennial fruitiness squeaks through, but the resin character of the centennial is pretty much missing. The bitterness is present, but not overt - the balance is definitely towards maltiness, rather than bitterness, but the flavours are balanced. The aftertaste is a mix of malt sweetness and mild bitterness.
Mouthfeel: This was brewed to be a medium-light bodied beer, and that's where it falls. The low mash temp made for a pretty fermentable wort, but the Caramunich II made sure a bit of body remained. Its not bone-dry, but its definitely on the drier side of the spectrum. The beer is refreshing, and leaves the drinkers mouth well whetted after a sip (or chug).
Overall: I achieved my goal - a beer that both a BMC drinker and craft-orientated drinker could both enjoy. That, of course, means that there are some compromises. Personally, I'd like a little more bitterness and hop character...in fact, this beer leaves me with a hankering for a hop-bursted, high-bitterness, IPA. Which, thanks to an 'accidental' over-ordering of the citra and centennial hops, will be happening this weekend at my brew clubs annual Learn 2 Brew event!
And if you're in the London area, you should come by and check the event out:
Sunday, 25 October 2015
Well, There Gose Christmas!
Nearly 2 months ago I blogged a teaser post on the brewing of my 2015 Christmas brew that would be entered into my home brew club's advent event, and given to my beer-loving family and friends.
This post is not about that beer.
Rather, this post is about another winter-holiday themed beer that is both a product of long planning (and fantasizing), plus a bit of last-minute brew-wizardry to make the brew-day happen. Sadly, I have no images of this last-minute brew, as I've recently taken a page from a fellow home-brewers book (hi, Devin!) and begun brewing late at night. Yep, 7 PM - midnight brew "days" do get you around all those irritating day-time things (jobs, family, friends, etc), but make for crappy photo-shooting conditions.
I wish I could claim this recipe as my own, and to some extent it is, but I received a lot of help on this one. The initial motivation for this beer is the table of Gose recipes by Cascade brewing in American Sour Beers; specifically, the all-to-brief mention of the winter gose featuring cinnamon, orange, hibiscus and cranberry. While a gose is a pretty straight-forward sour-ketteled beer, the balance of orange & hibiscus came from a very helpful set of private messages and public posting of a similar gose recipe by BigPerm over at HomebrewTalk. The remaining balance of cinnamon, cranberry, hops and salt are from my previous brewing experiences with gose and those particular ingredients.
Despite that, there was (of course) a bump in the road. I had planned on souring using Lactobacillus isolated from a bottle of Hottenroth. Unfortunately, the lacto culture got "infected" with yeast (you know you're not a normal brewer when the yeast is the infection), so I was forced to preare a last-minute lacto starter using 1.040 wort @ pH 4.5, a handful of grain, and a "homebrewed" incubator to keep the cultures at 44C. The last-minute starter worked, so the brewday(s) was/were saved.
Additional details and recipe can be found below the fold.
This post is not about that beer.
Rather, this post is about another winter-holiday themed beer that is both a product of long planning (and fantasizing), plus a bit of last-minute brew-wizardry to make the brew-day happen. Sadly, I have no images of this last-minute brew, as I've recently taken a page from a fellow home-brewers book (hi, Devin!) and begun brewing late at night. Yep, 7 PM - midnight brew "days" do get you around all those irritating day-time things (jobs, family, friends, etc), but make for crappy photo-shooting conditions.
I wish I could claim this recipe as my own, and to some extent it is, but I received a lot of help on this one. The initial motivation for this beer is the table of Gose recipes by Cascade brewing in American Sour Beers; specifically, the all-to-brief mention of the winter gose featuring cinnamon, orange, hibiscus and cranberry. While a gose is a pretty straight-forward sour-ketteled beer, the balance of orange & hibiscus came from a very helpful set of private messages and public posting of a similar gose recipe by BigPerm over at HomebrewTalk. The remaining balance of cinnamon, cranberry, hops and salt are from my previous brewing experiences with gose and those particular ingredients.
Despite that, there was (of course) a bump in the road. I had planned on souring using Lactobacillus isolated from a bottle of Hottenroth. Unfortunately, the lacto culture got "infected" with yeast (you know you're not a normal brewer when the yeast is the infection), so I was forced to preare a last-minute lacto starter using 1.040 wort @ pH 4.5, a handful of grain, and a "homebrewed" incubator to keep the cultures at 44C. The last-minute starter worked, so the brewday(s) was/were saved.
Additional details and recipe can be found below the fold.
Friday, 23 October 2015
Yeast v Bacteria

At the top of the image is a cluster of a normal yeast strain - Wyeast 1007 (German ale). They are slightly out-of-focus as I was trying to get the bacteria into focus. At the bottom of the cluster are two budding yeasts, in the middle is another budding yeast which is budding upwards (hence why the small bud is in-focus) and there is a non-budding yeast in the upper-left corner of the cluster. The "strand" extending upwards is a clump of trub.
The bacteria is an 'average' bacteria (E. coli, which you hopefully will never see in your beer), but which I added to this sample as a comparator.
Saturday, 3 October 2015
Happiness is a Bubbling Carboy...Training Wheels CPA
 |
| Go yeast go! |
This recipe is pretty straight forward - a Canadian Pale Ale, which much like history, is a blend of English and American influences. Namely, it incorporates the more interesting malt profile of an English ale, but hopped with "new" American-style hops at a modest (modest, how Canadian!) rate. Hopefully a beer I will enjoy, but not too crazy for a new brewer/light beer drinker.
The Recipe:
The recipe is dead-simple, for 40 L (10 US gallons):
- 8 kg Canadian pale ale malt (Maris Otter would be a good substitute)
- 0.45 kg Caramunich I
- 0.45 kg Caramunich II
- Enough bittering hops (14.8 g of Northern Brewer @ 8.5%) at 60 min to get to 36 IBU after late additions.
- 28 g of a 50:50 mix of Citra + Centennial whole hops at 15, 10, 5 minutes before the end of the boil + a final 15 min whirlpool addition (i.e. 112 g total)
- Irish moss, 15 min before the end of the boil
- Safale US-05 (2 packs)
Mash @ 66.7C (152F) for 60 min, then sparge & boil for 60 min. If everything goes right, the beer should come in at 36 IBU, SG of 1.049, ~9 SRM.
Ferment started in my pantry, which sits at ~16 C (~60 F) for 5 days, followed by moving it next to the furnace for the final 5 days at ~20 C (~68 F). As you can see above, even at 16 C the ferment was pretty active. The expected FG (1.010) was hit in 4 days, but there is still some bubbling going on, so it may drop a little lower.
The Brew Day:
Brew day was completely, totally and utterly uneventful. Which, given this was a brewday where I was teaching someone how to brew, was exactly what I was hoping for. We slightly exceeded our expected gravity (1.051), and hit our planned volume dead-on. The beer was chilled to 25 C, and then split between 2 x 23L (6 US gallon) carboys fitted with blow-off tubes which were transferred to my pantry where it cooled for 5 hours to 17 C, prior to adding the yeast. Five days later I fitted the carboy's with air locks and moved them next to the furnace to ensure diacetyl reduction and complete attenuation. As of today we're 6 days away from brew-day and 5 days prior to kegging. Hopefully, tasting notes will be posted in about 2 weeks!
Subscribe to:
Posts (Atom)