Pages

Thursday, 31 December 2015

2015 - A Year in Review

2015 is coming to a close, so is time for the annual look back.

The Good...
The blog is still getting a reasonable number of hits (155K as of today), but the youtube channel is doing really well and, if trends remain the same, will have more hits than the blog in roughly 5 months. No infected batches this year, and instead, I've brewed two of the best beers I recall making - These Gose Christmas, and an unnamed IPA I haven't bothered blogging about yet (and whose keg is nearly empty).

I also brewed batch #300 this year; a pretty notable milestone. Granted, I did not know at the time that it was batch #300, so in place of brewing something good I instead brewed a rather bland pale ale that didn't even warrant a blog entry (and even being beer #300, still doesn't warrant a blog entry).

The Bad...
Brewing output is down - all in (wine + cider + beer) I managed a paltry 14 batches this year. In my defence I did a compete tear-down and rebuild of my basement, plus added a giant new deck on the house. But the brewery (and my back) suffered as a consequence.

The Ugly...
Unlike last year, I get to leave the ugly slot empty this year. And that, folks, counts as a victory.


Some Quick Stats
My Favourite Blogs of 2015
(in no particular order)

Whats Coming Up in 2016?

December 9, 2016. And no, this isn't because its the 51st anniversary of 'A Charley Brown Christmas' (originally released Dec 9, 1965). Nor is it a celebration of the eradication of small pox (Dec 9, 1979). Nor is it a celebration of the birthday of actress Judi Dench (best 'M' of the Bond series, so far). Rather, it is the 20th anniversary of my first brew day! I've already brewed the beer to be consumed on that day...and I'm planning on the same day of re-brewing that first beer (although hopefully making a more palatable batch this time)...

Friday, 4 December 2015

Tasting Notes - Well There Gose Christmas

Picture doeen't do it justice; In the
right light the beer is medium-red,
and the head pink..
 A few weeks ago I blogged a recipe of a Christmas-themed Gose that I was brewing - flavoured with hibiscus, orange, cranberry and cinnamon, this was intended to be a unique Christmas beer for my winter enjoyment. So its time for some tasting notes.

I knocked this f***er out of the park. Hell, this may be the best kettle-soured beer I have ever produced.

Appearance: Red. The beer pours with a distinctive red coloured body; not the red of a melanoidin-rich barely based beer, but really really red. Crayon red. The wheat portion of the beer makes itself apparent in the haziness of the beer; combined with the red colour the effect is unexpected and visually pleasing - sadly, my shoddy camera work doesn't do it justice. The head itself is white with tinges of pink. Its highly carbonated, so the head pours thick and fine, and lasts for most of the pint.

Aroma: The cranberries dominate the aroma, with their unique sharp fruit character, along with a notable lactic aroma, shining through. Behind that is the sweet/berry aroma of hibiscus, a slight bready character, and a hint of yeastiness.
Belgian lace lasts right to the end


Flavour: This is where this beer shines. Up front is a bracing lactic sourness. The "tang" of the cranberry works alongside this, creating an overall "sourness" far more complex than what you normally get with a kettle sour, and yet retaining the clean sour profile that characterizes kettle soured beers. The hibiscus really acts to balanced this acidity through providing a sweet note - some sort of unfermentable glycoside, I assume - along with emboldening the fruit character provided by the cranberries. The orange plays a minor background role, giving a subtle orange-zest character noticeable mostly in the aftertaste. It took a number of test batches to dial-in the salt level to a level I like - and its perfect for this beer. The salt is present, but subtle. It acts more to tie the flavours together and to mellow the beer; the taste of salt is present, but mostly as a flinty character rather than an overt saltiness.

The only thing missing is the cinnamon. But given how wonderful the beer turned out, its absence is a blessing rather than a flaw.

Mouthfeel: Complex is the best description I can give. The beer was brewed to have a light body and be highly effervescent - and it is. The low finishing gravity combined with high carbonation and acidity creates a prickly, light mouthfeel on the tongue, especially as the beer enters the palate. But the salt works in opposition, rapidly adding a fuller, more meaty mouthfeel as the effervescence fades. The aftertaste is a mix of hibiscus sweetness/fruitiness, cranberry "tang" and lactic sourness, and fades in a way which leaves you wanting more.

Overall: If it isn't apparent already, this is a damned good beer. My second-best of the year (#1 to be blogged about soon), likely my best kettle-soured beer of all time, and in all honesty, one of the better sour beers that I've made recently. What it lacks in traditional sour-beer complexity is more than made up for by the interplay of the hibiscus, cranberry, acidity and salt. It is eminently drinkable, and yet, complex enough to be enjoyed slowly in front of a Christmas fire. There are four minor tweaks I would make upon re-brewing: 1) drop the cinnamon completely, 2) increase the hibiscus by 20-30%, 3) use the zest of an additional orange (3 instead of 2), and lastly, 4) brew a double, triple, or even quadruple sized batch. Because there's no way any of this beer will be left by Christmas!

Friday, 27 November 2015

Easy Home Yeast Banking - and a Video!

Wow, two videos in as many weeks - that has to be a new production record for me! This time around the video is on my most requested topic - an easy to implement home yeast banking system. The video outlines a method, based on the use of slants, to store yeast for future use. Managed carefully this method will allow the average home brewer to easily maintain stocks of up to 2 dozen strains with minimal cost or effort.

Because of the length of the video, and the presence of multiple separate methods, I have provided written instructions, below, to complement the video.


Tuesday, 10 November 2015

At long last, a new video!

A frequent question I receive here on my blog, and on other forums, is what microscope I would recommend for home use. This is a difficult question for me - I'm a medical researcher by profession, with microscopy representing the bread and butter of my lab (a bit of eye-candy from my labs work can be found near the beginning of the video). While on the surface this would appear to make me an ideal person to offer advice on microscope selection, alas, its not really true. Because I work with research-grade scopes (which are very pricey) I'm not really experienced in the cheaper, consumer-grade microscopes that are cost-effective for home use.

So in lieu of a video recommending specific models, I've instead put together a video discussing features to look for, along with comparison images to give you an idea of what the various features add to a microscope.

Also, I apologize for the crummy audio; I'm experimenting with screen casting as a way to speed video production (which, in my case, is excruciatingly slow), and haven't quite figured out how to properly balance my mic.

Monday, 9 November 2015

Triple-Recipe Update

I've somewhat fallen down on the blogger job - I'd done three brews in the past week and not one blog post about any of them.

In my defence, the first two batches barely qualify as either brew-days or recipes...enter this years ciders!

The recipe for both is dirt-simple:

Cider #1: This is the classical cider that I've brewed 3 times in a row now (last years recipe) - 20 L of fresh-pressed cider, 3 g potassium metabisulfate, 5 g of yeast nutrient, 3 tsp pectic enzyme and 1 packet Nottingham dry yeast. The process is dirt-simple:

  1. Add metabisulfate, let sit ~4 hours
  2. Add yeast nutrient and pectic enzyme, let sit overnight
  3. Add yeast, let ferment ~3 weeks before transfering to secondary
  4. Age until ready, typically 6 months.
Cider #2: Take the recipe for cider #1, drop the yeast and split everything else in half (its a half-batch). In place of Nottingham, pitch a Belgian yeast (Fermentas T-58, this time around). Everything else is the same. The hope here is to get an effect similar to mulled cider, but without the addition of spice.

Learn-To-Brew IPA
The third brew, brewed this Saturday, was a hop-bursted IPA which I brewed at my brewing clubs annual learn-to-brew event held at Forked River Brewing. For some reason I decided to go whole-hog on this beer - water additions, sparge acidification, whole hops, and so forth. But because this was a learn-to-brew event most of that (except the hops) got missed during the brew-day, so it may not quite end up where I wanted it. Regardless, its a pretty simple (and good smelling) brew:
  • 6 kg Canadain 2-row malt
  • 450 g Caramunich II
  • 230 g Victory malt
  • 85 g (3 oz) Centennial whole-hops, 15 min whirlpool
  • 85 g (3 oz) Citra whole-hops, 15 min whirlpool
  • Enough of a bitterning hop (N. Brewer), 60 min in the boil, to get the beer to 65 IBU
20 L final volume at 1.064. Mash for light body, use burtonized water, adjust mash pH with lactic acid, irish moss @ 15 min to help clear.

Of course, to replicate this beer add the salts to the boil, rather than to the mash/sparge, forget the irish moss, and boil for ~68 minutes, all while forgetting to take photos of the brewing event because you're too busy teaching new people to brew yakking with anyone who drops by your mash tun.

Thursday, 5 November 2015

Tasting Notes - Training Wheels CPA

Even the dog comes running for some CPA!
So the Training Wheels Canadian Pale Ale has been kegged for a while (truth be told, I'm probably near the bottom of the keg). So how did it turn out you ask? It's pretty good!

The goal of this beer was a beer that was easily enjoyed by both the "big-3" beer drinker and the more craft-orientated brewer. To achieve that end I employed a middle-or-the-road approach to a pale ale; a more interesting malt profile than is the norm for a hoppier pale ale, but then modestly hopped with a mix of citra & centenial.

This combination makes for a pretty good beer - its not going to wow a true hop-head, and it may be a little more than a BMC drinker is used to, but it should keep drinkers in both camps happy...I know its been keeping me happy as I wait for other beers to mature.

Here's the breakdown:

Appearance: Copper coloured and quite clear. Pours with a dense white head that last for the pint.

Aroma: Hop aroma is present but subdued. Because I know what went into it I can pick out the citra fruit notes and the centennial resinousness, but I think that most people would simply say it has a modest new-world hop aroma. Along side that is a wonderful malt aroma - a clear malt/sweet note that is nicely balanced by the hops.

Flavour: The flavour of the beer is pretty good - up-front is a nice maltiness; somewhat sweet, but not excessive. The hop flavour is more subdued than I had expected; a bit of the citra/centennial fruitiness squeaks through, but the resin character of the centennial is pretty much missing. The bitterness is present, but not overt - the balance is definitely towards maltiness, rather than bitterness, but the flavours are balanced. The aftertaste is a mix of malt sweetness and mild bitterness.

Mouthfeel: This was brewed to be a medium-light bodied beer, and that's where it falls. The low mash temp made for a pretty fermentable wort, but the Caramunich II made sure a bit of body remained. Its not bone-dry, but its definitely on the drier side of the spectrum. The beer is refreshing, and leaves the drinkers mouth well whetted after a sip (or chug).

Overall: I achieved my goal - a beer that both a BMC drinker and craft-orientated drinker could both enjoy. That, of course, means that there are some compromises. Personally, I'd like a little more bitterness and hop character...in fact, this beer leaves me with a hankering for a hop-bursted, high-bitterness, IPA. Which, thanks to an 'accidental' over-ordering of the citra and centennial hops, will be happening this weekend at my brew clubs annual Learn 2 Brew event!

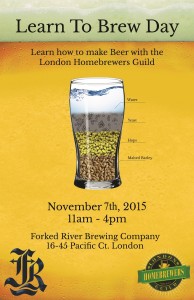
And if you're in the London area, you should come by and check the event out:

Sunday, 25 October 2015

Well, There Gose Christmas!

Nearly 2 months ago I blogged a teaser post on the brewing of my 2015 Christmas brew that would be entered into my home brew club's advent event, and given to my beer-loving family and friends.

This post is not about that beer.

Rather, this post is about another winter-holiday themed beer that is both a product of long planning (and fantasizing), plus a bit of last-minute brew-wizardry to make the brew-day happen. Sadly, I have no images of this last-minute brew, as I've recently taken a page from a fellow home-brewers book (hi, Devin!) and begun brewing late at night. Yep, 7 PM - midnight brew "days" do get you around all those irritating day-time things (jobs, family, friends, etc), but make for crappy photo-shooting conditions.

I wish I could claim this recipe as my own, and to some extent it is, but I received a lot of help on this one. The initial motivation for this beer is the table of Gose recipes by Cascade brewing in American Sour Beers; specifically, the all-to-brief mention of the winter gose featuring cinnamon, orange, hibiscus and cranberry. While a gose is a pretty straight-forward sour-ketteled beer, the balance of orange & hibiscus came from a very helpful set of  private messages and public posting of a similar gose recipe by BigPerm over at HomebrewTalk. The remaining balance of cinnamon, cranberry, hops and salt are from my previous brewing experiences with gose and those particular ingredients.

Despite that, there was (of course) a bump in the road. I had planned on souring using Lactobacillus isolated from a bottle of Hottenroth. Unfortunately, the lacto culture got "infected" with yeast (you know you're not a normal brewer when the yeast is the infection), so I was forced to preare a last-minute lacto starter using 1.040 wort @ pH 4.5, a handful of grain, and a "homebrewed" incubator to keep the cultures at 44C. The last-minute starter worked, so the brewday(s) was/were saved.

Additional details and recipe can be found below the fold.

Friday, 23 October 2015

Yeast v Bacteria

I occasionally get e-mails (and forum posts) asking questions about identifying yeast versus bacteria in microscopy images. I'm just posting this here as an example of what an average yeast looks like compared to an average bacteria.

At the top of the image is a cluster of a normal yeast strain - Wyeast 1007 (German ale). They are slightly out-of-focus as I was trying to get the bacteria into focus. At the bottom of the cluster are two budding yeasts, in the middle is another budding yeast which is budding upwards (hence why the small bud is in-focus) and there is a non-budding yeast in the upper-left corner of the cluster. The "strand" extending upwards is a clump of trub.

The bacteria is an 'average' bacteria (E. coli, which you hopefully will never see in your beer), but which I added to this sample as a comparator.

Saturday, 3 October 2015

Happiness is a Bubbling Carboy...Training Wheels CPA

Go yeast go!
Last weekend I had the opportunity to teach my SWIMBO's uncle how to brew. Because teaching a new brewer the ropes makes for a busier brew-day I didn't have time to blog the recipe...so here is is a week late.

This recipe is pretty straight forward - a Canadian Pale Ale, which much like history, is a blend of English and American influences. Namely, it incorporates the more interesting malt profile of an English ale, but hopped with "new" American-style hops at a modest (modest, how Canadian!) rate. Hopefully a beer I will enjoy, but not too crazy for a new brewer/light beer drinker.

The Recipe:
The recipe is dead-simple, for 40 L (10 US gallons):

  • 8 kg Canadian pale ale malt (Maris Otter would be a good substitute)
  • 0.45 kg Caramunich I
  • 0.45 kg Caramunich II
  • Enough bittering hops (14.8 g of Northern Brewer @ 8.5%) at 60 min to get to 36 IBU after late additions.
  • 28 g of a 50:50 mix of Citra + Centennial whole hops at 15, 10, 5 minutes before the end of the boil + a final 15 min whirlpool addition (i.e. 112 g total)
  • Irish moss, 15 min before the end of the boil
  • Safale US-05 (2 packs)
Mash @ 66.7C (152F) for 60 min, then sparge & boil for 60 min. If everything goes right, the beer should come in at 36 IBU, SG of 1.049, ~9 SRM.

Ferment started in my pantry, which sits at ~16 C (~60 F) for 5 days, followed by moving it next to the furnace for the final 5 days at ~20 C (~68 F). As you can see above, even at 16 C the ferment was pretty active. The expected FG (1.010) was hit in 4 days, but there is still some bubbling going on, so it may drop a little lower.

The Brew Day:
Brew day was completely, totally and utterly uneventful. Which, given this was a brewday where I was teaching someone how to brew, was exactly what I was hoping for. We slightly exceeded our expected gravity (1.051), and hit our planned volume dead-on. The beer was chilled to 25 C, and then split between 2 x 23L (6 US gallon) carboys fitted with blow-off tubes which were transferred to my pantry where it cooled for 5 hours to 17 C, prior to adding the yeast. Five days later I fitted the carboy's with air locks and moved them next to the furnace to ensure diacetyl reduction and complete attenuation. As of today we're 6 days away from brew-day and 5 days prior to kegging. Hopefully, tasting notes will be posted in about 2 weeks!

Friday, 25 September 2015

Tasting Notes - Brett'd Sour Opprobrium

Enjoyed on the last
day of summer
Back in July I brewed a kettle-soured Berliner Weisse, which I split into two batches - one fermented straight with German Ale (Wyeast 1007), which was kegged and carbed within 10 days of brew day. The second half was fermented with the same yeast, but then underwent a secondary fermentation for ~2.5 months with a blend of Wyeast & White Lab's B. claussenii and Wyeast's B. lambicus. Those familiar with those brett strains will see that my goal was to add a nice fruit character to the beer, with a hint of funk.

The non-bretted version turned out pretty good - not quite as sour as I was hoping, but it was very quaffable. So what did the brett do to this beer?

Appearance: Its a Berliner - hazy (although not as hazy as the non-bretted version, likely because of its longer ageing), very pale in colour, and pours with a nice, long-lasting head.

Aroma: A tropical fruit character is apparent, as is a bit of lactic acidity. The bread notes of the unbretted portion are very muted - I don't think I'd notice they were present if I didn't know to look for them.

Flavour: The hoped-for fruit character has come through. The mix of bretts produced a nice fruitiness, although a specific fruit character has not been achieved. There's a bit of citrus and some stone fruit. In addition, a bit of leathery/earthy brett funk has emerged, giving this beer an additional interesting edge. Not only has the brett enhanced the flavour profile, but it also seems to have increased the acidity - I suspect this is an apparent change (rather than more actual acid), likely due to a lowering of the maltiness by the activity of the brett. The acidity balances nice with the fruit and funk, making for a wonderfully balanced beer.

Mouthfeel: Crisp, dry and acidic. Very refreshing. After taste is lactic with hints of fruit.

Overall: A huge improvement over the original - more apparent acidity, a more complex flavour profile, and a more pleasing mouthfeel. While the base recipe could use a little tweaking (in particular, a step-mash to get a more fermentable wort, replacement of some gravity with sugar, and a more aggressive Lactobacillus for the sour-ketteling), the addition of brett was a great way to improve on the beer. I've brewed bretted Berliners in the past, and while this one is not the best of them, it remains a very good beer.

Tuesday, 22 September 2015

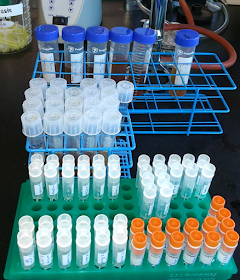
Happiness is a Full Test-Tube Rack

Twenty-six new yeasts for the yeast bank!

Thank you fellow yeast farmers.

Top: 6 bottle cultures
Middle: 14 wild & 6 commercial yeast strains
Bottom: Cryovials to store them all

Friday, 18 September 2015

Dammit . . . err, tasting notes

Didn't take a picture of the beer, so here is a
photo of some of its ingredients instead.
Woe is me - a few weeks ago I brewed a pretty basic rye Saison. The good news is its one of the better beers of 2015; the bad news (and hence the woe) is the keg is now empty, meaning I'm effectively out of kegged beer (although, in my hour of need, I did keg the bretted portion of this years Berliner Weisse...2 months early).

So, how did the saison taste? This is from memory, so hopefully its correct.

Appearance: Pale yellow, almost white. Slightly cloudy, with a thick white head that leaves traces of Belgian lace down the sides of the glass.

Aroma: Classic saison fruitiness + earthyness. Coriander aroma is present, but in the background.

Flavour: Wow - crisp, earthy, fruity. Pretty much the character you'd expect from a classic European saison. Coriander doesn't come through as a clear taste, but rather complements the yeast spiciness. Rye adds a nice crisp flavour to the beer.

Mouthfeel: Because of the rye, this beer has a thicker body and slick mouthfeel which is somewhat off-style - even with a final gravity of 1.004. I gave this beer a higher carbonation level (nearly 3 volumes), which lightened this up somewhat and gave the beer an almost champaign-like acidity which faded as the beer warmed and lost carbonation.

Overall: Overall this was a pretty good beer for the end of the summer - crisp and refreshing, and light but with a lot of flavour. I cycle to work, and this beer was always a welcomed finish to the ride home - especially on the hot and humid days that rounded out August. Aside from the rye this is about as classical a saison as you can make, and had all the character you would expect of a lower-gravity saison. If I were to re-brew this I'd drop half the rye for wheat, but leave the recipe otherwise unchanged - that should retain th rye character, while removing the out-of-place slick mouthfeel.

Sunday, 6 September 2015

Teaser - Révolte des Anges

Raisins
(blackened)
Normally, I like to provide all the details of a brewday - recipe, brew notes, etc - on my blog. But today is an exception, as among my blog readers are a number of people whom are also on my Christmas beer-list &/or in my brew clubs advent exchange. And, as you may have guessed, this means I'm brewing this years advent brew today.

True to this years theme (Murphy's law, or perhaps angry weather gods), the second I try a difficult beer nature works against me. My 20% beer brewed last winter took place - of course - on the coldest day of the year. It was so cold that I couldn't get the propane to flow, and ended up performing an ~6 hour boil on my electric stove top. Today's brew is going the other direction; today may be the hottest day of the year, with a humidex of ~40C. While that isn't going to stop me from brewing, it is causing me to lose a lot of sweat.

Blackened raisin puree, orange zest, rosemary
and some good hops.

Any way's, the purpose of today's post is more a teaser for those on my xmas/advent lists than a recipe/brew day. This years xmas/advent beer has some unique elements to it - blackened raisins, orange zest & rosemary to be exact. It's also a funky beer, being brewed with a mix of Bier de Guarde yeast and my house blend of Brettanomyces - a mix of 6 commercial and wild Bretts.

This should be a good beer, and if I recall I'll post the recipe & tasting notes around Christmas-time.

Friday, 28 August 2015

2015 Hop Harvest

Left: Cascade, Right: Goldings
Another growing season has passed, leading to another hop harvest. In past years I've always done a fresh-hop ale; in fact, that is the main reason I grow my own hops as there isn't really any other way to brew such a beer at the homebrew scale. Unfortunately, life has gotten in the way and a 2015 harvest ale is not on the menu.

We had an odd summer this year, leading to less than ideal growth  - after drying I ended up with ~200g (~1/2 lb) of Cascade and a meagre 70g of Goldings. That's a 30% and near 80% reduction in yield compared to last years harvest. I think my hops get too much sun, but unfortunately, there is little I can do about that.

Anyway's the hops are dried down, bagged and in the freezer. Hopefully a bitter or brown ale will make the September brew schedule, where the Goldings can shine as a late addition. Given how good it has been the past few years, most - if not all - of the cascade's are going to make their way into a variation of my Black Mamba Imperial Rye IPA (batch 1, 2).


Sunday, 23 August 2015

Tasting notes - 2.5 Years of Gnarly Roots

As I have written about several times in the past, I am a fan of long-aging beers and the evolution of flavours that aging brings upon these beers (posts 1, 2, 3). Indeed, one of the earlier homebrew's I discussed on my blog was the brewing of the Gnarly Roots Barley Wine - a classic barely wine recipe from Charlie Pappazian's Hombrewers Companion, which has the notable feature of also being a funky beer that is aged with B. bruxellensis and B. lambicus.

This beer is very nearly 2.5 years old (specifically, it is 890 days, AKA 2 years, 5 months and 7 days old). I've posted two tasting notes about this beer previously - one at bottling, when the beer was ~7 months old, and a second when the beer was ~1.5 years old. Over that time the beer began t age nicely; the original strong bitterness had begun to fade, classical aged flavours (sherry, caramel) had begun to form, and some hints of Brettanomyces had begun to emerge. Its been almost another year since I posted the last set of tasting notes, and its time for a new one, as I think the beer is finally nearing its peak.

Appearance: The beer pours a bright coppery-red, crystal clear, with a soapy white head. But you have to pour carefully - proteins are beginning to precipitate out, meaning a poor pour leaves the beer cloudy, with noticeable chunks at the bottom of the glass. This loss of protein (plus the 12.8% alcohol) causes the head to be short-lived, although a thin ring persists around the edge of the glass until the end of the pint.

Aroma: Malt sweetness dominates, complemented with with a pleasant blend of sherry and fruit notes. A subtle funk is present in the background, as is a slight alcohol note.

Flavour: The beer has achieved a fantastic balance - the extreme hop bitterness of the young beer has faded, while the sherry and caramel notes typical of aged beers have become the dominant flavours. As the beer warms a fruit character emerges - a mix of classical English fruitiness plus some bretty-stone fruit. In the background is a small hint of leathery funk, lending a subtle refinement to the flavour. There is almost no alcohol heat, and no fusel hotness at all. It is amazing how this initially unbalanced beer has achieved such a great balance of complex flavours, through nothing more then time in the cellar. The aftertaste itself is one of lingering sweetness and a subtle leatheriness.

Mouthfeel: The body of the beer is medium, but is fading as the brett continues to slowly consume the remaining dextrans - also resulting in an increase in carbonation, with the beer now quite effervescent. While above what is normal for a barley wine, the prickling sensation of this higher carbonation accentuates a slight alcohol burn in the aftertaste - the only real indication you get that this beer is over 12% in strength.

Overall: This beer embodies everything about aged beers that I enjoy - a continual building of complex flavours, ever changing balance between flavours, and a unique character that cannot be replicated through any process other then long aging. This is a beer for sipping; good for a quiet afternoon on the deck (or, in winter, in front of a fire), where you can take the time to enjoy the complexity of the beer and the changes in flavour that emerge as the beer warms. It was a fair bit of work to get it to this point, and only half the batch remains, but the end product was well worth the effort and wait.

Monday, 3 August 2015

Brew Day - Summer Rye Saison

Northern Brewer, Tettnanger & Coriander
So despite my less-than-ideal results with my Berliner Weisse, I'm still quaffing a litre of it a day, meaning the keg is rapidly approaching empty. As we're smack-dab in the middle of the hot and humid phase of summer another easy-drinking and refreshing beer is on the menu - specifically, my favourite summer beer Saison. In the interest of having a beer in the keg within 2 weeks there's nothing funky about today's recipe - its a modest-gravity recipe, crisp thanks to the use of rye, a subtle spiciness provided by a dash of corriander, and a driness provided by a mix of low mash temperature and a dose of sugar in place of malt.

Beautiful day to brew outside!
To ensure a rapid ferment I'm blending the finicky Dupont strain (whose flavour I prefer) with ol' reliable Wyeast 3711 (French saison), and ramping temperatures from 18C to 26C over the ~10 days of fermentation.

As always, recipe and brew-day notes are below the fold.

Tuesday, 21 July 2015

Sour Opprobrium - Tasting Notes

An ideal summer afternoon - Berliner Weisse, tunes and
a magazine on the backyard deck.
So the Berliner Weisse that was a topic of a rather extensive post two weeks ago is kegged and carbed, meaning its time for a tasting!

This beer was a rapid sour, produced by souring pre-hopped wort in the kettle using a mix of commercial Lactobacilli. After 3.5 days of souring a 35C the wort was briefly boiled, hopped with Hallertauer, and fermented with German ale yeast (Wyeast 1007). 8 days after mashing in the beer was fermented and in the keg...it carb'd up last week while I was away at the cottage and is now ready to drink.

Appearance: Its a Berliner - cloudy, pale yellow-white, soap-like head. In a bit of a surprise, the head lasts a while; a rarity in acidic beers.

Aroma: A mix of wheaty/bread and lactic acid dominate the aroma, some "yeast" aroma is in the background.

Flavour: Lactic acid is upfront, alongside a sweet malt character. The usual breadiness of a Berliner is present, but not as strong as I'd prefer. Yeast character is somewhat neutral. The degree of acidity is lower than I expected - perhaps due to the higher than expected malt sweetness altering the balance.

Mouthfeel: Dry, but not quite as crisp as I'd prefer. After taste is slightly sweet and sour.

Overall: Given  the acidity of the wort prior to pitching the yeast (3.4) I'm surprised this isn't more sour - the sourness is on-style, but is on the weaker end and edges towards insufficiently sour. I think this is a result of my overly high efficiency on this batch - I normally aim to use sucrose for 10-15% of the fermentables, which guarantees a crisp finish. In this batch my higher-than-expected efficiency meant I could not add any sugar without seriously exceeding the alcohol range I was looking for. In fact I had to dilute the wort an extra 10% just to get it where I wanted.

So its a good beer, but not the beer I was hoping for; in place of a sharply sour and crispy dry beer I instead have a softly sour, slightly sweet beer. Its still refreshing, and on-style, but its on the opposite side of the style guidelines from what I was looking for. The good news is that the residual sweetness should work well with the Brett added to the other half of the batch; over the next month or so it should consume those dextrans, leaving a much drier beer with a more pleasing sour character.

Wednesday, 8 July 2015

Choosing the Right Probiotics for Souring Beer

A more-and-more common practice for quick sour beers is to use probiotic pills as a source of lactobacilli for the souring process. Indeed, the Milk the Funk Wiki has a growing list of alternate sources for these bacteria, including many probiotic capsules. A question that seems to rise quite often on this topic is "can I use probiotic brand X for souring beer". So here is a quick guide on figuring out whether a probiotic will work for souring beer.

In general, probiotic organisms fall into four categories when considering using them for souring:
  1. Good choices
  2. Probably don't matter
  3. Avoid under some circumstances
  4. Avoid at all cost

Good Choices:

Bacteria that represent good choices are those which have the capacity to sour wort, and will do so with a minimal risk of off-flavours. These are solely species belonging to the Lactobacillus genus - i.e. Lactobacillus sp, where sp merely means "any species".  Lactobacillus plantarum and Lactobacillus rhamnosis are two of the more commonly seen probiotic strains, but any probiotic containing bacteria whose name starts with 'Lactobacillus' will work well.

Probably Don't Matter:

Species which "probably don't matter" are those which are unlikely to grow in wort; either because the homebrewer lacks the ability to lower the oxygen level in the wort to the point where these organisms grow, or because wort isn't nutritionally compatible with these species. The flip side is that if these organisms grow, they should do the same thing as Lactobacillus - i.e. sour the wort while producing minimal off-flavours. So that's why they probably don't matter - they're not likely to do anything, but if they do end up doing something, they will help your wort sour. Included among these are:
  1. Bifidobacteria sp. (again, sp means "any species")
  2. Streptococcus thermophilus
  3. Leuconostoc sp.

Avoid Under Some Circumstances:

Only one group of organisms fall into this grouping - the Saccharomyces, as in species of yeast from the same genus of yeast that brewing yeast come from. At the time of this post the only Saccharomyces commonly seen in probiotics is Saccharomyces boulardii. Saccharomyces sp. fall into the "avoid under some circumstances" category as they will ferment sugars to form alcohol. You probably should avoid these - they will compete with Lactobacillus for sugars, and thus limit acidification. In addition, if you are planning on heating the wort after souring (to either pasteurizing or boiling temperatures), you will boil off the resulting alcohol leading to a beer with very little sugar left for the subsequent fermentation.

So as a rule you will want to avoid these, although it may be an interesting experiment to see what kind of beer you get if you pitch a Saccharomyces boulardii-containing probiotic mix into your fermenter.

Avoid At All Cost:

The last group are those you want to keep as far away from your wort, beer and fermenter as possible. These are bacteria which can produce horrid off-flavours and ruin a beer. In this group there are currently three types used in probiotics, but this list may get longer in the future:
  1. Clostridium sp. These guys can make butyric acid, which smells and tastes of a mix of parmesan cheese and vomit.
  2. Enterococcus faecium. This bacteria can make bioactive amines, which some people are severely allergic to. Moreover, these amines are often quite unpleasant, and are what give shit and corpses (among other things) their unique odours.
  3. Bacillus sp. (most often Bacillus ereus, clausii, and pumilus) make diacetyl (butter) and may also make bioactive amines.
Clearly, we don't want t be dumping any of the above guys in our beer!

EDIT/UPDATE: Stefan Wiswedel has done some experiments looking at probiotics containing amylases (which break down starches/dextrans) and protinases (which degrade proteins) along side the usual probiotic bacteria. Turns out using these is a bad idea - it kills the body and flavour of the resulting beer. Stefan has posted additional details in the comment section, below.

A Simple Rule of Thumb

So that's a lot - but a good rule-of-thumb is to limit yourself to probiotics that contain only Lactobacillus species, which is easy to remember when you're at the store. 

But if your memory is better than mine, than any probiotic with Lactobacillus sp. plus any of Bifidobacteria sp.Streptococcus thermophilus or Leuconostoc sp. will be good as well.

And if the probiotic contains anything but the above 4 groups of organisms, I'd recommend you stay away.

Thursday, 2 July 2015

How I Sour Mash...& A Recipe!

Wort, souring in the garage
I get the occasional request to explain how I sour-mash/sour-wort. So you ask, so you shall (eventually) receive!

Along with a description of my method - which is not all that unusual compared to methods others have published - I'm going to add in a few microbiology insights, some information on determining when you want to stop the souring process, and some other random hints & tips.

If you missed it, I also put up a post a few weeks ago about preparing lacto starters - a key thing you will need to do for a good sour mash/wort. Around the same time, 5-blades brewing put out a good post on harvesting wild lacto safely - a method I've used myself. Eureka Brewing also put up a post on optimized "media" for lactobacillus culture. I haven't tried Sam's media recipe, but its sound from a microbiology point-of-view. For a complete picture of the sour-mash/worting method I'd recommend reading this post alongside these other posts.

I've prepared this post alongside a brew-day, so I've include my standard Berliner Weiss recipe at the end. I love this recipe - simple and straight-forward, is great straight-up, but also works as a perfect base for fruited (lemon & cherry are excellent), s (coriander & salt = pseudo-gose), or bretted for a funk & fruit finish.  I am doing a split batch this time around, to make the most of the recipe.

Details, as always, can be found below the fold.

Friday, 29 May 2015

Tasting Notes: Return of the Black Mamba

The label for my tap handles
So I've posted a few recipes this year, but have done a bad job with the follow-up (i.e. tasting notes). So here's the notes from this months earlier brew Return of the Black Mamba.

This is a Black Imperial Rye IPA, hopped predominantly with home-grown cascade hops - 250g (about 1/2 lbs) worth. This is the second iteration of this recipe, the first being brewed with my virgin crop of hops. The first time around this beer was good; the second time (this time) around the beer is pretty good - and with a few tweaks I think the third attempt will be stellar. But enough of that - what's the beer like?

Appearance:
The beer pours black, with a modest beige head that lasts, and lasts, and lasts. Held up to a light, the beer is crystal clear and reveals a dark-red hue.

Aroma: The aroma is hop-forward, resinous, with a bit of rye's unique character in the background. Despite the darkness of the beer, the aroma of roast is minimal, although the roast note gets stronger as the beer warms.

Nice lookin' pint!
Flavour:
Here the beer could use some work. Upfront you get a good dose of Cascade goodness; mostly in the form of resin, but a bit of citrus comes through (I've found my home-grown Cascades lean to resin & spice more than citrus). Underneath that is a surprising amount of malt sweetness - unexpected given the low mash temp and use of dry-enhancing rye. There is a strong chocolate note, but thanks to the use of Carafa Special II, without any astringent notes. Unfortunately, the beloved character of rye is hard to find, despite it accounting for 25% of the grain bill. With homegrown hops its hard to predict bitterness, but I was overly conservative this time around and the bitterness is a little on the mild side. As with the last time I brewed this beer, the character of the Conan yeast is not obvious - there is a nice "generic" ester profile, but the peach/apricot nature of the Conan yeast isn't clear.

All of the above works out to a pretty nice imperial porter. But dammit, this was supposed to be an IPA! The beer needs less body, less chocolate, and a whole whack more IBUs!

Mouthfeel:
The beer has a medium body - not as light as I was hoping for, but not unusually heavy for an Imperial IPA. The level of hopping is sufficient to give a nice lingering bitterness - with a subtle hint of chocolate - but again, not at the level (of residual hop bitterness) that I was hoping for.

Overall:
Despite my above whining, this is actually a pretty nice beer. Nice balance of malt and hops, easily (too easily!) drinkable, and deceptively hides its nearly 8% alcohol content. But its not what I had envisioned in my mind for this beer - I was hoping for a drier, more bitter beer with a robust rye character. I'm going to thoroughly enjoy drinking this keg of beer, but changes will be made the next time I brew this beast.

Next Time:
So this recipe is nearly there, but next time (Return of the Return of the Black Mamba?) I'd make three - hopefully final - changes:
  1. Reduce the amount of Carafa Special II by one third to one half, to reduce the chocolate notes.
  2. Replace about 10% of the gravity from the pale malt with sugar to provide a drier finish.
  3. Increase the bittering charge to 50-60 IBU (from its current ~35 IBU) to make or a bolder bittering - giving a final IBU of 70-90.

Michael Tonsmeire Drops Some Knowledge

My favourite home-brew channel (Chop & Brew) just posted a video of sour beer guru Michael Tonsmeire discussing the brewing of sour beers. He starts off with the basics (advice to follow if brewing your first beer), but goes into some of the finer details later in the video. So grab your headphones, a homebrew, and retreat to a quiet corner of your home and let the knowledge flow through you...


Edit:

Want the Cole's notes version of the details? Here's two handy tables:
Controlling Funk:
Maximize Minimize
Add wheat malt Avoid wheat malt
Perform a ferulic acid rest (42C/1208F for 15-30 minutes) Avoid low-temperature rests; go straight to Saccharification
Primary ferment with a spicy strain (Belgian, hefeweizen) Primary ferment with a clean yeast
Use a phenolic Brett (B. lambicus, B. bruxellensis) No Brett, or a mild brett (B. claussenii)
Sour beer in primary fermenter (autolysis = phenols) Rack to secondary after fermentation. Optional:  cold crashing/fining/filtering
Bottle condition Force carbonate

Controlling Acidity:
Maximize Minimize
High saccharification temperature (158-160F, 70-71C) Low saccharification temperature (146-148F/63-34C)
Use less attenuative brewers yeast Pitch highly attenuative brewers yeast
Sour with L. brevis and Pwediococcus Use Wyeast/White Labs L. delbrueckii, or L. buchneri for souring

Wednesday, 20 May 2015

So this happened...

I'm sure that this will come as a surprise to no one, but I'm a bit of a nerd. Hell, I was a nerd before being a nerd was cool - WTF happened there? I grew up on a pretty much constant stream of SciFi & dystopia - Star Trek, Star Wars, Mad Max, Knight Rider, Alf, Dr. Who, Red Dwarf, the Jetsons, X-Files, Star Gate, Futurama...lets just say that list goes on for a while.

Anyway's, this guy:


Is now this guy:


And then this happened:

And apparently there will be a part 2...
(all of Wil Wheaton's blog posts on homebrewing can be found here)

Monday, 18 May 2015

Lacto Starters

Starter wort, for the L. brevis and L.
buchneri
to be used in my upcoming beer
Its almost time to brew a quick sour for the upcoming summer...which means that it is time to begin preparing starters of the lacto, sacch and brett going into the beer. Its been a few years since I blogged about brewing this kind of beer - a sour Berliner Weisse which can be ready in as little as 10 days - or which can act as the basis of more complex beers through the addition of Brettanomyces, fruit, herbs and blending with other beers.

But more on that later. Today's post is on a topic I get asked about with some regularity; namely, how to prepare a starter for Lactobacillus. A proper starter is especially important for sour worting, both to minimize the risk of infection by other bacteria, and also to ensure a reasonable souring time (a few days).

The good news is that lacto starters are easy - almost as easy as yeast, but you do need a bit more equipment.

For the starter you will need:
  1. 1.040 starter wort (or apple juice, or MRS media)
  2. Yeast nutrient (optional, but a good idea, especially if using apple juice)
  3. A temperature controller
  4. A heat source (I use a crock-pot)
As always, details are below the fold.

Friday, 8 May 2015

Purifying Yeast from Infected Cultures - Part 2

A couple of days ago I put up a post describing the first step in purifying a contaminated yeast culture. In that post I described a simple method (requiring some specialized reagents) which allows a contaminated sample to be depleted of a contaminating bacteria, and also to provide semi-pure cultures of Saccharomyces and Brettanomyces. But as far as that method goes, it doesn't ensure complete depletion of the contaminants, nor pure cultures of Sacc or Brett.

So how do we get a totally pure culture? The answer...streak plating, followed by a quick screen to ensure purity.

Details below the fold.

Tuesday, 5 May 2015

Purifying Yeast from Infected Cultures - Part 1

Mixed Saccharomyces (large ovoid cells) and Brettanomyces
(elongated cells) yeast culture contaminated with cocci
(top-centre "string") and rod-shaped bacteria
One of the most requested topics I receive is how to clean up an infected yeast sample. I've alluded to the use of streak plates, and basic identification of organisms, etc, for cleaning up yeast previously, but despite that I've yet to give a detailed example of how I go about cleaning up a contaminated yeast sample.

Provenance has smiled down on me, in the form of an infected attempted bottle culture of a mixed sacch and brett fermented saison from The Bruery, provided to me by a local home brewer. The contamination was not a "good" one - i.e. not a lactic acid bacteria contamination - but rather one that produced a rather putrid sulphur/brimstone aroma.

So how do we fix that...and how can we easily get pure strains of the brett and sacc strains used in the beer?

In this, the first part of a 2-part post (part 2 can be found here), I will go through a basic procedure to enrich the Saccharomyces and Brettanomyces from the infected culture using a selective/differential media and culture conditions to enable the growth of the desired yeast species while inhibiting the growth of the undesired bacteria and yeast. In part 2, hopefully posted later this week, I'll go through a final clean-up procedure to ensure the resulting cultures are, in fact, clean of the contaminating yeast and bacteria.

As always, details are below the fold...

Monday, 4 May 2015

Saturday, 25 April 2015

Return of the Black Mamba

The hops for this beer.
I was digging through the deep-freeze a few weeks ago and came across the tightly vacuum wrapped remains of 2014's hop harvest - 270 g (~9.5 oz) of Cascade hops. Not to sure what to with my unexpected bounty, I looked back to see what I did with the home-grown Cascades last year. Turns out last years beer was an Black Imperial Rye IPA - The Black Mamba IPA. Tasting notes (and memory) revealed that this was one of last years better beer, so I thought "what the hell, lets do it again".

Last years beer ended up being under-gravity (more a BRIPA than a BIRIPA) as I  had begun experimenting with wet milling my grain and had over-whetted the grain. I've now optimized this method, so I hope to hit the desired gravity (1.071) instead of missing it like I did last year (1.059).

But what to do with all those hops? The answer - add them all to one beer! For accuracy, the 75 minute bittering addition will be 34 IBU's of Northern Brewer, but everything else is the home-grown cascade.

My (hopefully temporary) $10
3-tier mash system
How do you work in 270 g (over a half-pound) of home-grown hops? The answer is lots of additions - 57 g (~2 oz) at 20, 12 and 5 minutes, plus another 57 g in a 15 minute hop stand (half added at flame-out; half added 7.5 minutes after flame-out). But that leaves 34 g (~1.5 oz) unaccounted for - that would be the prime hops; the ones I put aside into their own little pack as they had the most resin and aroma of the harvest. Those are being held back for a 3-day dry-hop after primary fermentation is complete. Estimated IBU's are 67; maybe lower or higher depending on just how bitter the home-grown hops are.

Grain bill is pretty much unchanged from last year - good quality Canadian pale malt as a base malt, 25% rye for that refreshing rye crispness, some carafa special II & victory malt to round things out. Again, I am trying Conan, but will coax more ester flavour out of it by under-pitching (50% the recommended rate) and minimally oxygenating the wort. Fermentation will begin at 18 C (65 F, AKA my basements temperature) and ramp up to 22C (72 F) to finish. I'm going all-out, and even altering the water to up the sulphate and magnesium to make the hops pop.

Full Recipe & Brewday Notes Below The Fold

Friday, 17 April 2015

100,000 Views!

When I started this blog a few years ago I didn't expect it to amount to much - this was intended as more of an unlosable brew-log (which it has failed as; I'm horrible at recording my brewdays here), but has morphed into something completely different. As of right now I'm a few hits away from 100,000 views (not counting my own), and will probably cross that mark by the time I hit the "Publish" button.

I'd like to thank all my readers for your interest in what I've been writing here - the ongoing hits, comments emails - and more recently youtube views - are what motivate me to add new material.

So to all my readers/viewers, thank you. I'd also like to thank my major traffic sources (check them out - they're all great):

Thursday, 9 April 2015

BREAKING NEWS - White Labs Official Statement on Brett trois.

As the followers of my blog are likely aware, there has been a growing body of evidence that WLP644 (Brettanomyces trois) is, in all likelihood, a Saccharomyces (conventional brewing) species. I, and other bloggers did a series of genetic tests that pretty firmly nailed down the genus  of WLP644 as Saccharomyces (although the exact species remains somewhat nebulous).

Many brewers have been directing questions at White Labs about this, and their reply to-date has been rather guarded. Today, they broke their silence (PDF), and confirmed that trois is, indeed, a Saccharomyces. Ironically, they've based this on a far less robust measure than the data myself and others have generated - they determined the genus simply by looking at the size of one of the regions myself, and others, sequenced to ID this yeast.

White Labs has an extensive sequencing project on-going which I expect will reveal to us some exciting (and perhaps upsetting) data on the yeast strains we know and love. While WLP644 is clearly a Saccharomyces, the exact species remains unclear - indeed, one of the sequences we have floating around suggests it may be something all together new. Indeed, white labs is rather guarded in their conclusions (they call WLP644 a "brux-like Trois"), which makes me suspect they too didn't get a clean species ID on the yeast.

More updates to come as more information becomes available.

Previous Posts:

Tuesday, 31 March 2015

Canadian Bacon Ya'll

Homemade peameal (sans meal), ready for frying
So this post has nothing at all to do with brewing, or even movies from the 1990's, but rather has to do with...bacon. Specifically, the making of the king of all bacons - peameal bacon (aka Canadian bacon, aka back bacon). My Canadian readers, depending on exactly where in Canada they live, will be well aware of this wondrous meat by at least one of three names - in the west it typically goes by the name of "back bacon", although some stores sell it as "Canadian bacon". Out east it is most often sold under the name peameal bacon - so-named as it was historically sold rolled in white bean meal (today corn meal is the norm). Regardless of which name you call it by, it is a wonderful thing - its the bacon you pull out for special events like Mothers Day brunch, or Christmas breakfast, or because you feel like spoiling yourself.

My international readers probably have no idea what I'm talking about - this isn't your classical salted and smoked pork-belly bacon, nor is it the product sold in some US states as "Canadian bacon" - this is a much more refined piece of cured meat; a cross between a corned beef, ham, and classical bacon. It is a brined pork loin, which after brining is typically rolled in either corn meal or white pea meal before cooking. You can slice it thin and serve it with breakfast, or smoke it to make a great sandwich meat, or even slice it thick and fry (or BBQ) it and eat it on a bun. And as with beer, it is easy to make at home, and when "home brewed", yields a product superior to that sold in most stores.

Recipe and all that other fun stuff below the fold...

Tuesday, 17 March 2015

New Video! Casting Agar Plates

The next video in my "your home yeast lab made easy" video series is finally complete. This video covers the preparation of agar plates for yeast and bacterial culture. The video covers two media preparation for propagating yeast and brewhouse bacteria, proper plate handling, sterilization, casting and growth characteristics. Additional media recipes can be found below the fold...


Tuesday, 17 February 2015

A (sort-of) update on Brett trois

Some of my readers will be aware that I and several others have done some genetic analyses that suggest that WLP644 (Brett trois) may in actuality be a Sachharomyces. For those not familiar with this issue, or who need a refresher, my post covering both my work and some of the work done by others can be found here: Brett Trois - A riddle, wrapped in a mystery, inside an enigma.

Chris White talked briefly about the "controversy" surrounding the true identity of Brettanomyces trois in a Cheers Charlotte podcast a few days ago (time stamp 28:45 to 30:05). He didn't give away the punchline, saying "it is too early to tell" and that "we have seen some signs it is Saccharomyces". He went on to state that the results he has seen are mixed and that it is not yet clear. Apparently, they are waiting for the whole genome sequence to determine what it is, and if it is a hybrid. But it sounds to me like he is leaning towards a Saccharomyces identification as well.

Monday, 16 February 2015

Ambrosio, The Fallen Monk

This post is the ultimate post (minus the inevitable tasting notes & updates which will follow over the upcoming months and years) in my Brewing Vintage Beers Series. Today's beer is  a Belgian Septuppel, which is the closest number I could come up with that matches the normal Belgian beer-naming scheme*. What is this oddity? It is a strong Belgian Dark Strong (aka a Quad) fermented to at least 20% ABV, and potentially 2-3% beyond that.

* An analysis of over 80 Belgian Enkels, Dubbels, Tripels and Quads reveals that commercial brew "names" follow the formula %vol = [4.0296 * 1.3559%vol]. I.E. a 20% beer would be:
20% = [4.0296 * 1.3559Bel], where Bel = 1/2/3/etc (Enkel, Dubbl, Tripel, etc)

My new eHLT in action
(in my under-construction video
studio - AKA laundry room)
Why would anyone do such a thing? For me, there is two reasons. The minor reason being that while I've brewed mead's that pushed up close to 20%, I've never hit or exceeded this strength. Its a completely arbitrary, and yet almost mystical threshold. What lies beyond that I do not know - perhaps beer nirvana, more likely a really bad hangover, but either way I want to see what is one the other side.

The main reason is a bit different - December 9th, 2016 will mark the 20th anniversary of my first brewday. I though it would be nice to have a beer whose ABV was at least as large as the years leading up to the anniversary. To make sure this happens I have over-designed the beer; assuming it attenuates as I expect I should get a beer at 22-23%, but I suspect I may not get quite that much attenuation, and as such, I've hedged my bet. I'm brewing it now since I'm certain its going to emerge from the primary as a fusel, ester and phenolic mess, but with roughly 20 months of aging ahead of it, it should have turned into something really nice on time for 12/9/2016.

To get to that mystical 20% I'm using every trick in the fermenting high gravity beer playbook. Multiple yeast additions, holding back the ~20% of fermentables that are sugar until a day or two into primary ferment, multiple yeast additions, multiple oxygenations, and I'm pitching a shit-tonne of yeast (roughly 5 million/ml/oP) thanks to my use of my last brews yeast cake. And the ace in my sleeve - a backup 2L starter of White Labs super high gravity yeast. I'm hoping to not need that bad-boy, but if I do he's ready to go.

41 L of wort boiling on the range.
Brew-day itself was a bit of a mix-up; I recently bought an electric HLT from one of the co-owners of Forked River Brewing (I guess you don't need to homebrew when you have a real brewery), so I was able to do my mash indoors, with the plan of venturing outside into the -25C weather for the boil. Turns out propane valves freeze at -25C - even if the propane itself is at room temperature, but my wonderful wife was kind enough to clear out the kitchen for the day so it was a full-volume boil on the electric range too get this beer down to gravity - adding an hour to what was already supposed to be a 3 hour boil. But in the end I exceeded my numbers slightly by 4 points), and everything looks like it went well, so now onto the ferment.

The recipe, brew-day notes and other details are included below the fold, but I thought I'd spare a word on what is now the second really odd name I gave to a beer in the past 2 weeks. These two beers are deeply connected - with "Matilda, The Seductress" functioning as a starter for "Ambrosio, The Fallen Monk". These names are not arbitrary - they are drawn from my favourite novel, "The Monk" by Matthew Gregory Lewis (legally available free from the Gutenberg Project). In this novel the young monk Ambrosio is seduced by Matilda - a familiar of the devil - leading Ambrosio down a road of murder, rape, insect, and eventually death at the hands of Satan himself. As with the novel, the beer "Matilda , The Temptress" gives Ambrosio his drive to darkness (namely, a lot of yeast) - and "Ambrosio, The Fallen Monk" somewhat follows the tradition of naming these beers after devils & other dark creatures...

Saturday, 31 January 2015

Quick & Simple Invert Sugar

2 kg (~5 lbs) of invert sugar. The one on the right is slightly less
caramelized due to better temperature control during inversion
In some of my previous posts I've covered the making of Belgian Candi Sugar (Posts 1, 2), but this isn't the only hard-to-find brewing sugar out there. For my upcoming big beer I need a healthy dose (2 kg) of invert sugar - something which around here you cannot get in anything less than industrial amounts (a hundred kilos minimum order).

Invert sugar is used in a lot of English-style beers; it is simply table sugar (sucrose, a glucose chemically bonded to a fructose) broken down into its constituent glucose and fructose molecules. In theory it is easier for yeast to ferment this sugar, hence why it is popular in high-gravity brewing.

Several of my readers and youtube viewers (and myself) have reported issues with sugar crystallizing, which if you're lucky makes a hard-crack sugar ugly, but if it gets too bad can turn your sugar into an unmanageable - and insoluble (which is bad for brewing) mess. I've been working on this issue and have found a solution - the details are included in this post, and can be applied to both Belgian candi sugars as well as to invert sugar.

And as with candi sugar, don't forget that this can be quite dangerous - you are working with a sticky liquid well above the boiling point of water. Wear long-sleeved shirts and pants, cover your feet, and be as careful as you can be.

So how do we make it - its easy, but as always the details are found below the fold.

Sunday, 25 January 2015

Matilda, The Seductress

The Temptation of the Idler
Albrecht Dürer, 1498
This is the penultimate post (minus the inevitable tasting notes) of my Brewing Vintage Beers Series. Today's beer is  a Belgian Enkel, also known as a Patersbier. This is a style of beer that I wish was much more common - it has all the flavour and complexity of a double or triple, but comes in at less than 5% ABV and thus is quite sessionable. It solves all of the problems of dubbel and tripels; you can imbibe in pint after pint of an Enkel without finding yourself hugging the floor as the room spins around you.

This beer is obviously not a high-gravity beer, so why is it part of the vintage-beer series? The answer is that this isn't just any old beer - it is also a massive stater for one hell of a big beer I'll be brewing (and posting about) in two weeks time, and its also been scaled up to provide a few extra litres of wort to test-ferment a dozen wild yeasts I've isolated over the past year. This is truly a beer with many faces!

To make this beer a good "starter" for producing yeast I am taking the rather unusual route of adding yeast nutrient to what is a beer that wouldn't normally require it - but keep in mind, our goal isn't simply a good beer, but its also healthy yeast at the end of the ferment. Yeast nutrient plus a strong oxygenation will fulfill that goal.

Some may be wondering about the odd name for this beer. I don't want to give too much away, but it is related to one of my favourite novels and also to the name of the strong/vintage beer this beer's yeast cake will be re-pitched into.

Recipe & brew-day notes below the fold...

Tuesday, 20 January 2015

Brewing long-aging beers - fermenting high-gravity beers

As promised last week, this is the fourth instalment in my "Brewing Vintage Beers" series. In this post I'm going to cover some of the methods that homebrewers can use to ferment beers that push - or even exceed - the rated alcohol tolerances of the yeasts being used. Experienced brewers will likely see nothing new here, but I've tried to include a bit of the science behind what the different methods do, so that my readers have a better idea of why these things work and are often necessary.

There are a number of things you can do to get full attenuation when brewing high-gravity ales, namely:
  1. Yeast selection
  2. Pitch rates
  3. Late/repeated oxygenation
  4. Late sugar additions
  5. Late yeast additions
  6. Managing the fermentation
  7. What if the batch doesn't ferment completely?
Details below the fold